 share on pinterest
Now that summer is in full swing, there is the eternal question — where should I sit? If you have $20, you can build your own bench that’s sturdier than many of the benches you could buy at a big box store.
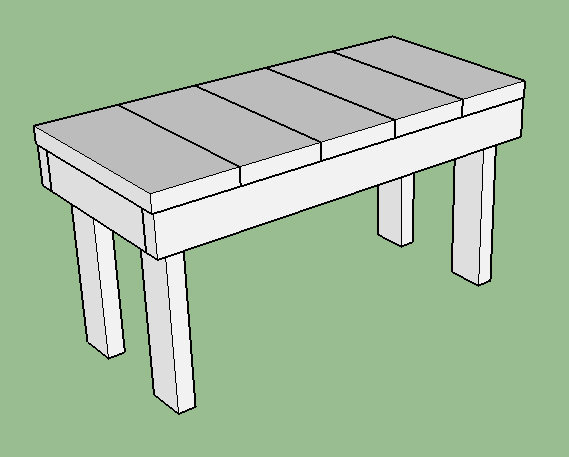
Final dimensions of 3′ x 1′ 5″ x 1′ 7″
The main purpose of this project was to get rid of some spare wood that was lying around, so there were a few different designs that were made for this particular bench. The shopping and cut lists are below, along with a SketchUp mock of how each design would look (SketchUp file will all three designs available here). Pick your favorite and start building!
Bench with horizontal 2×4 boards on top.
2×4 Horizontal Top Shopping List
- 4 – 2×4 @ 8′
- 22 – 2 1/2″ Screws
2×4 Horizontal Top Cut List
- 6 – 2×4 @ 3′
- 3 – 2×4 @ 1′ 2″
- 4 – 2×4 @ 1′ 6″
Bench with vertical 2×4 boards on top.
2×4 Vertical Top Shopping List
- 4 – 2×4 @ 8′
- 28 – 2 1/2″ Screws
2×4 Vertical Top Cut List
- 2 – 2×4 @ 3′
- 2 – 2×4 @ 1′ 2″
- 4 – 2×4 @ 1′ 6″
- 7 – 2×4 @ 1′ 5″
- 1 – 2×4 @ 2′ 9″
Bench with vertical 2×8 boards on top.
2×8 Top Shopping List
- 3 – 2×4 @ 8′
- 1 – 2×8 @ 8′
- 24 – 2 1/2″ Screws
2×8 Top Cut List
- 2 – 2×4 @ 3′
- 3 – 2×4 @ 1′ 2″
- 4 – 2×4 @ 1′ 6″
- 5 – 2×8 @ 1′ 5″
The build instructions are specifically for the bench with the 2×8 top, since I had a lot of spare 2×8 pieces to get rid of. The instructions are similar for all three bench designs so it should be easy to piece together what to do for the other two designs, but if you need any help feel free to leave a comment below.
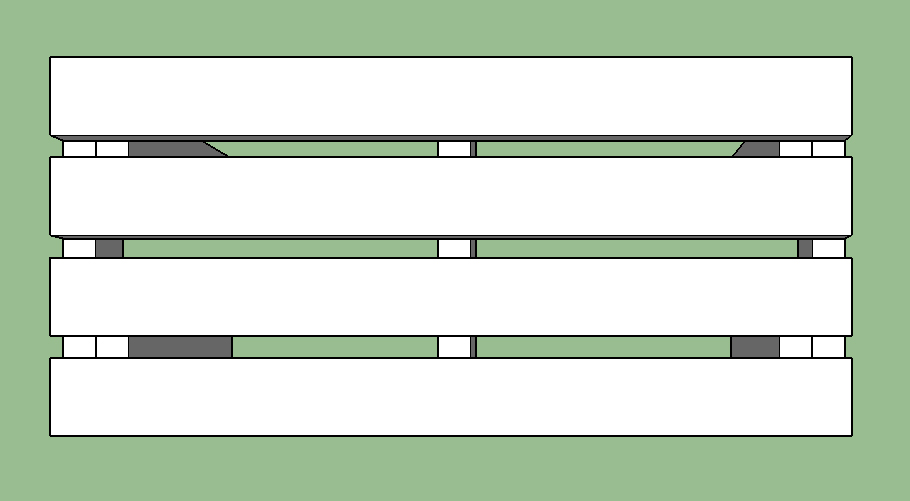
Assemble The Box
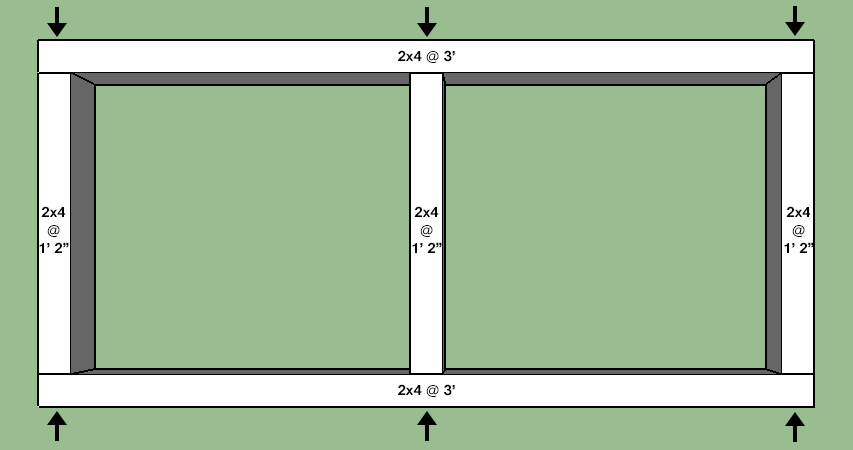
Arrows indicate where to place the screws.
The first step is to assemble the box that the top will rest on and that the legs will be attached to. Screwing together a bunch of free standing wood is easier said than done. Pre-drilling holes before driving in the screws will make this step a lot easier. You might also want to get someone to hold the pieces as you screw them together, or clamp the pieces down onto a workbench if available.
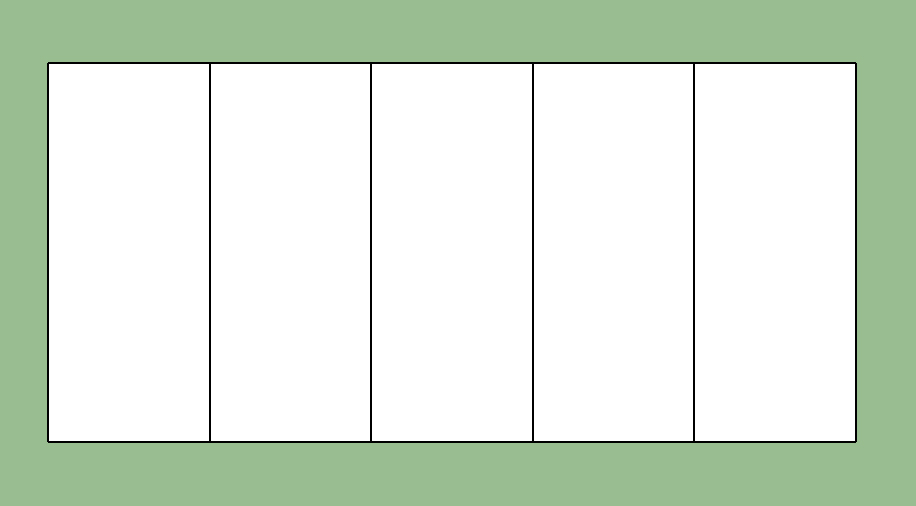
Assemble The Top
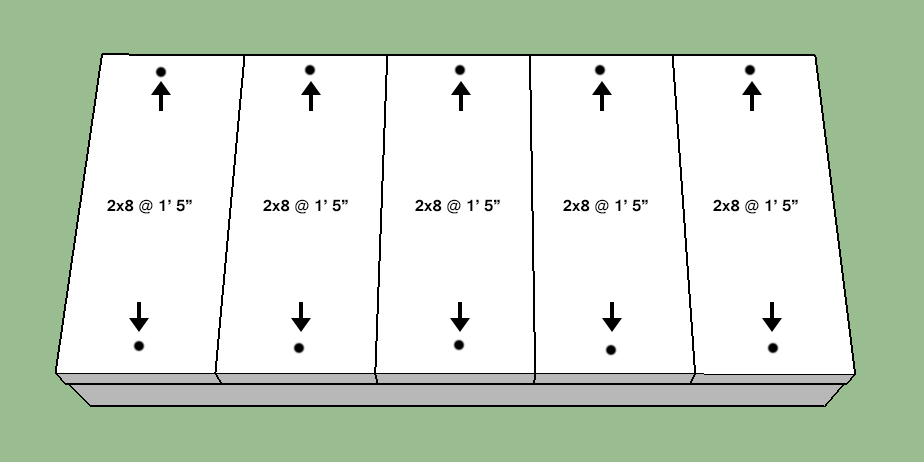
Arrows and dots show where to place the screws. Screws should be about 3/4” away from edge of board.
Now the top boards need to be screwed onto the box. If the top boards seem wobbly when you put them on the box, try flipping the box over and try again. The bottom of the box may be more flush. Note that the 2×8 boards will be be a little too large on either end, but don’t worry about it too much.
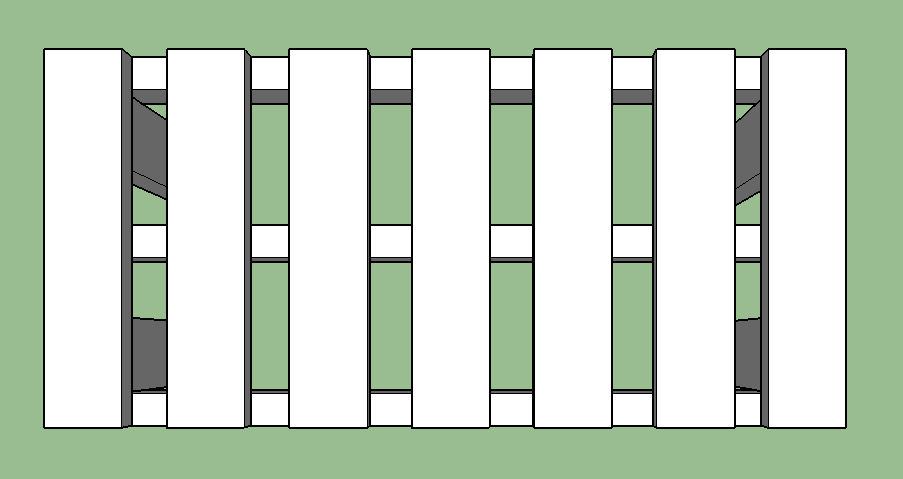
Assemble The Legs
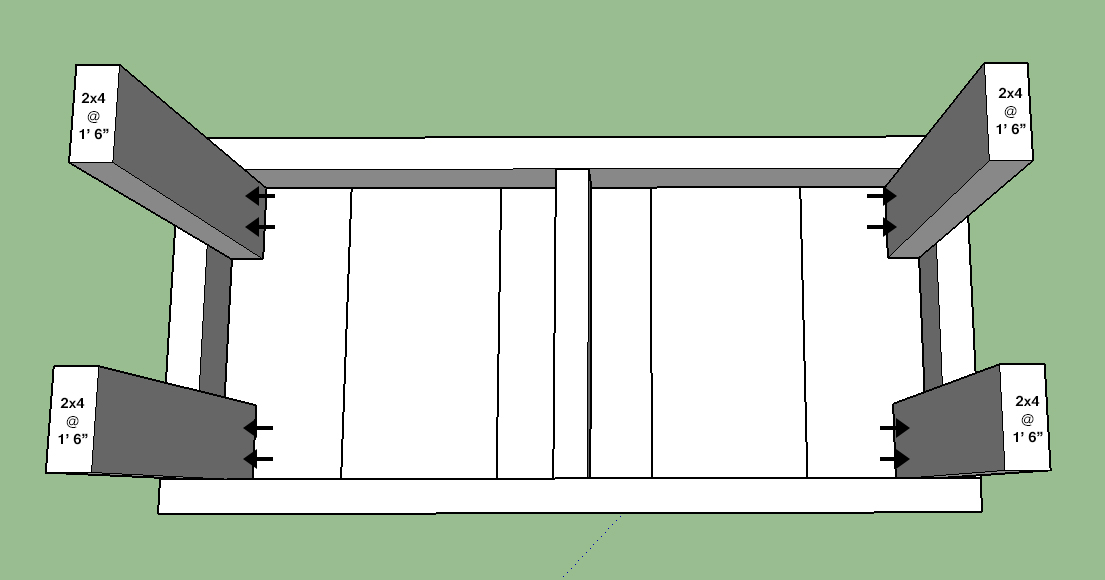
Arrows and dots show where to place the screws. Screws should be about 1 3/4” away from where the leg attaches to the top.
Finally, flip the bench upside down and attach the legs. You may want to use a clamp or get someone to hold the legs in place, if available. My plan originally called for more 2×4 boards to connect the legs together, but the legs were plenty strong as is.
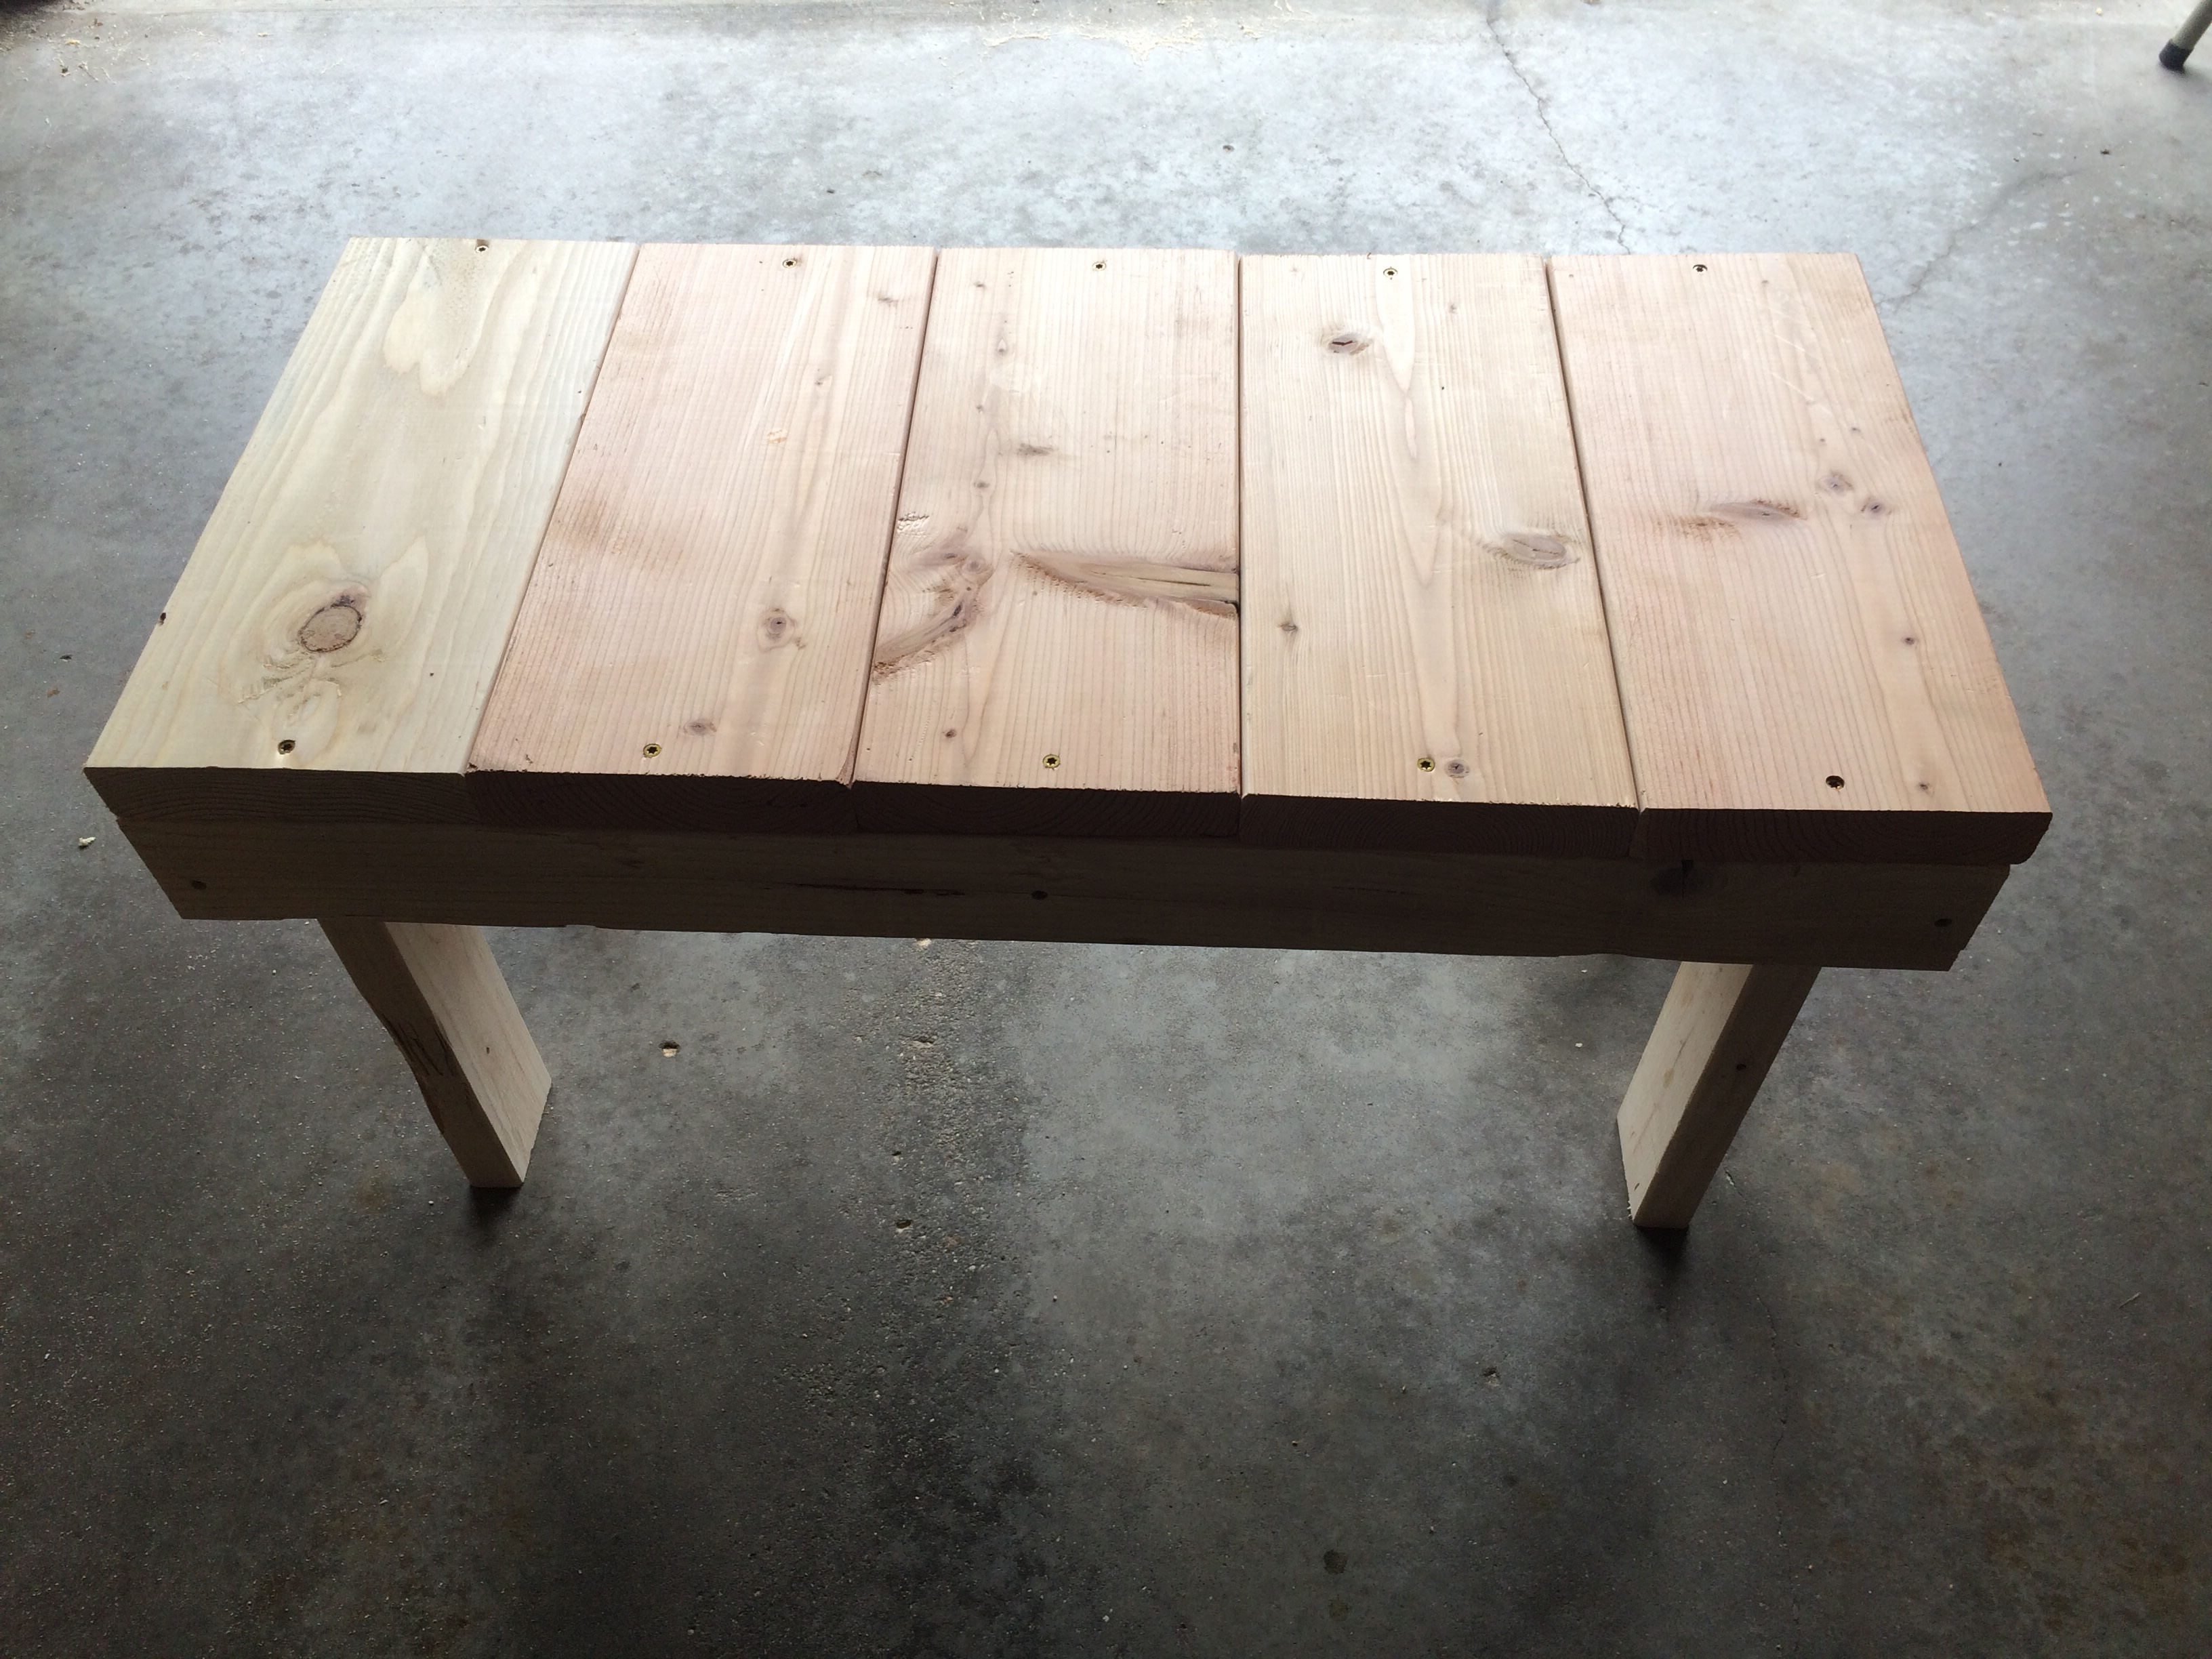
The finished bench.
The bench should be complete! Not bad for less than $20 worth of wood.
If you make this project, send us a picture at greatrecessionliving@gmaill.com and we’ll add it to this post!

Very cool!