 share on pinterest
If you have spare wood lying around, you can make this quick and easy Halloween decoration with a few simple cuts and a bit of paint. Even better, make several tombstones with different designs to decorate your whole lawn!
Materials:
- 1 2×8 Plank
- White Paint Rated for Outdoor Use
- 2 Tubes Pale Grey Acrylic Paint
- 1 Tube Black Acrylic Paint
- 1 Large Square Paintbrush
- 1 Small, Angled Paintbrush
- Newspaper
How To:
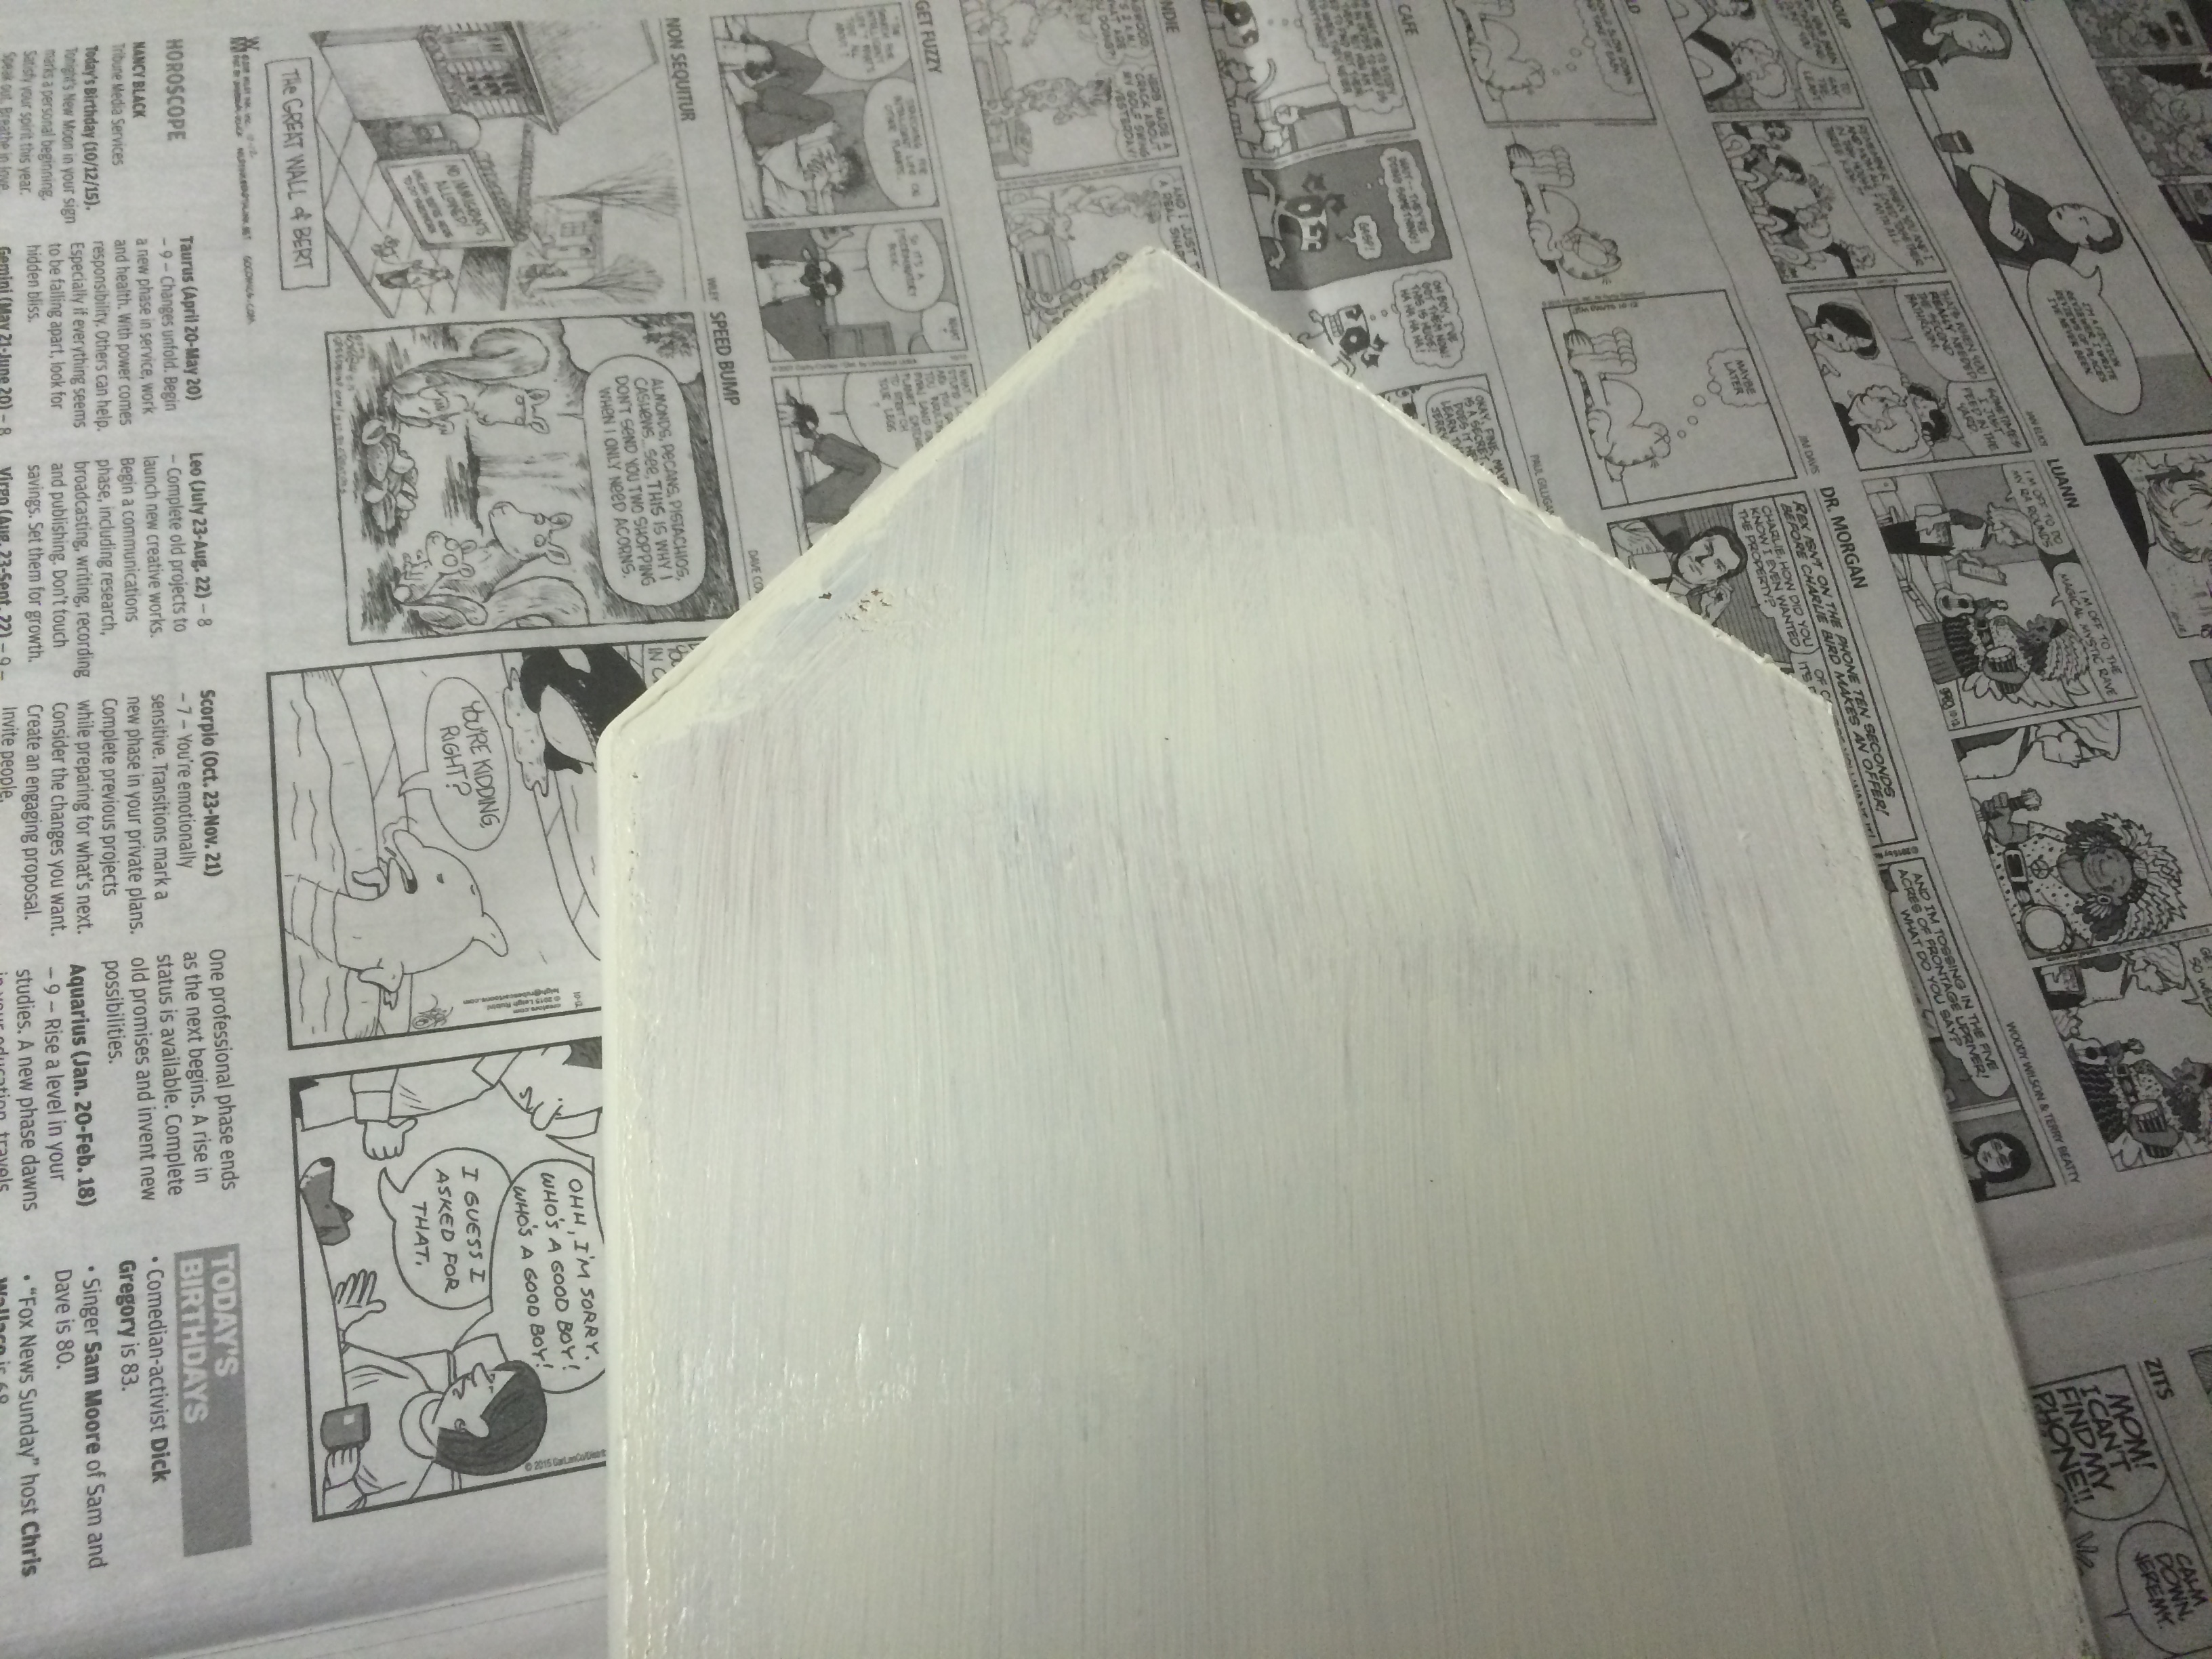
- Select a 2×8 plank with the length that you want for your tombstone or cut a plank down to size.
- Cut the top two corners off of the plank.
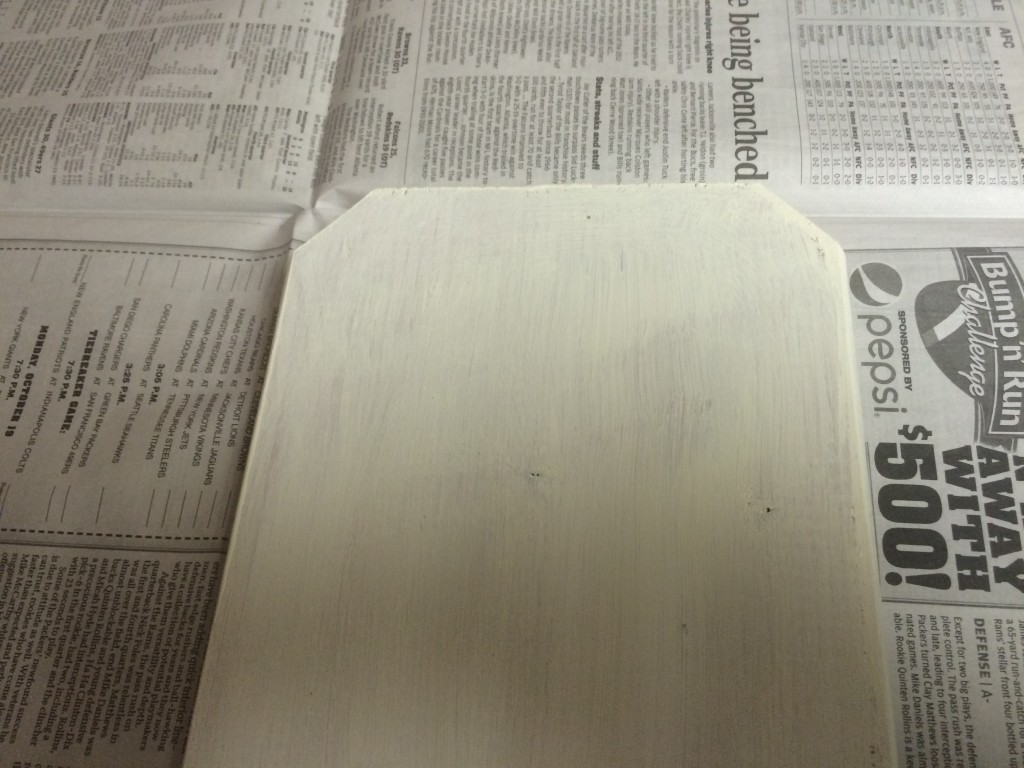
Forgot to take picture before we painted it!
- Cut the bottom of the plank into a stake. This will help you get it into the ground.

- Paint the board white with an outdoor-proof paint. This will give it a good color base and will protect the wood. Since latex paint is really messy, you’ll want to do this outside or in the garage.
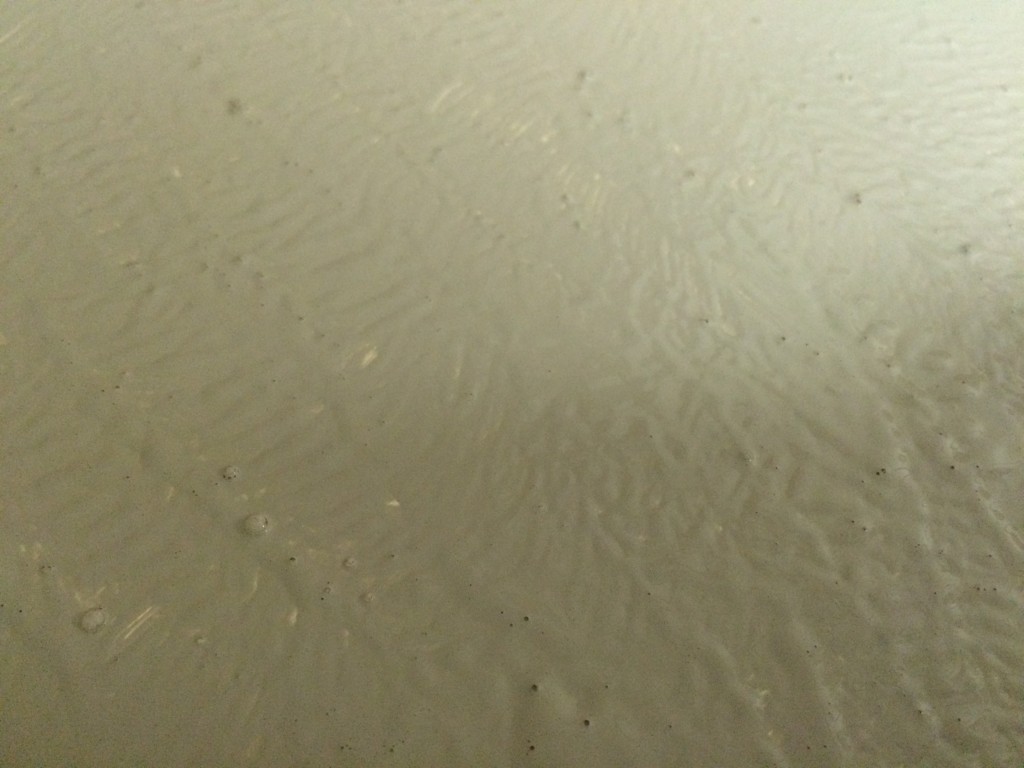
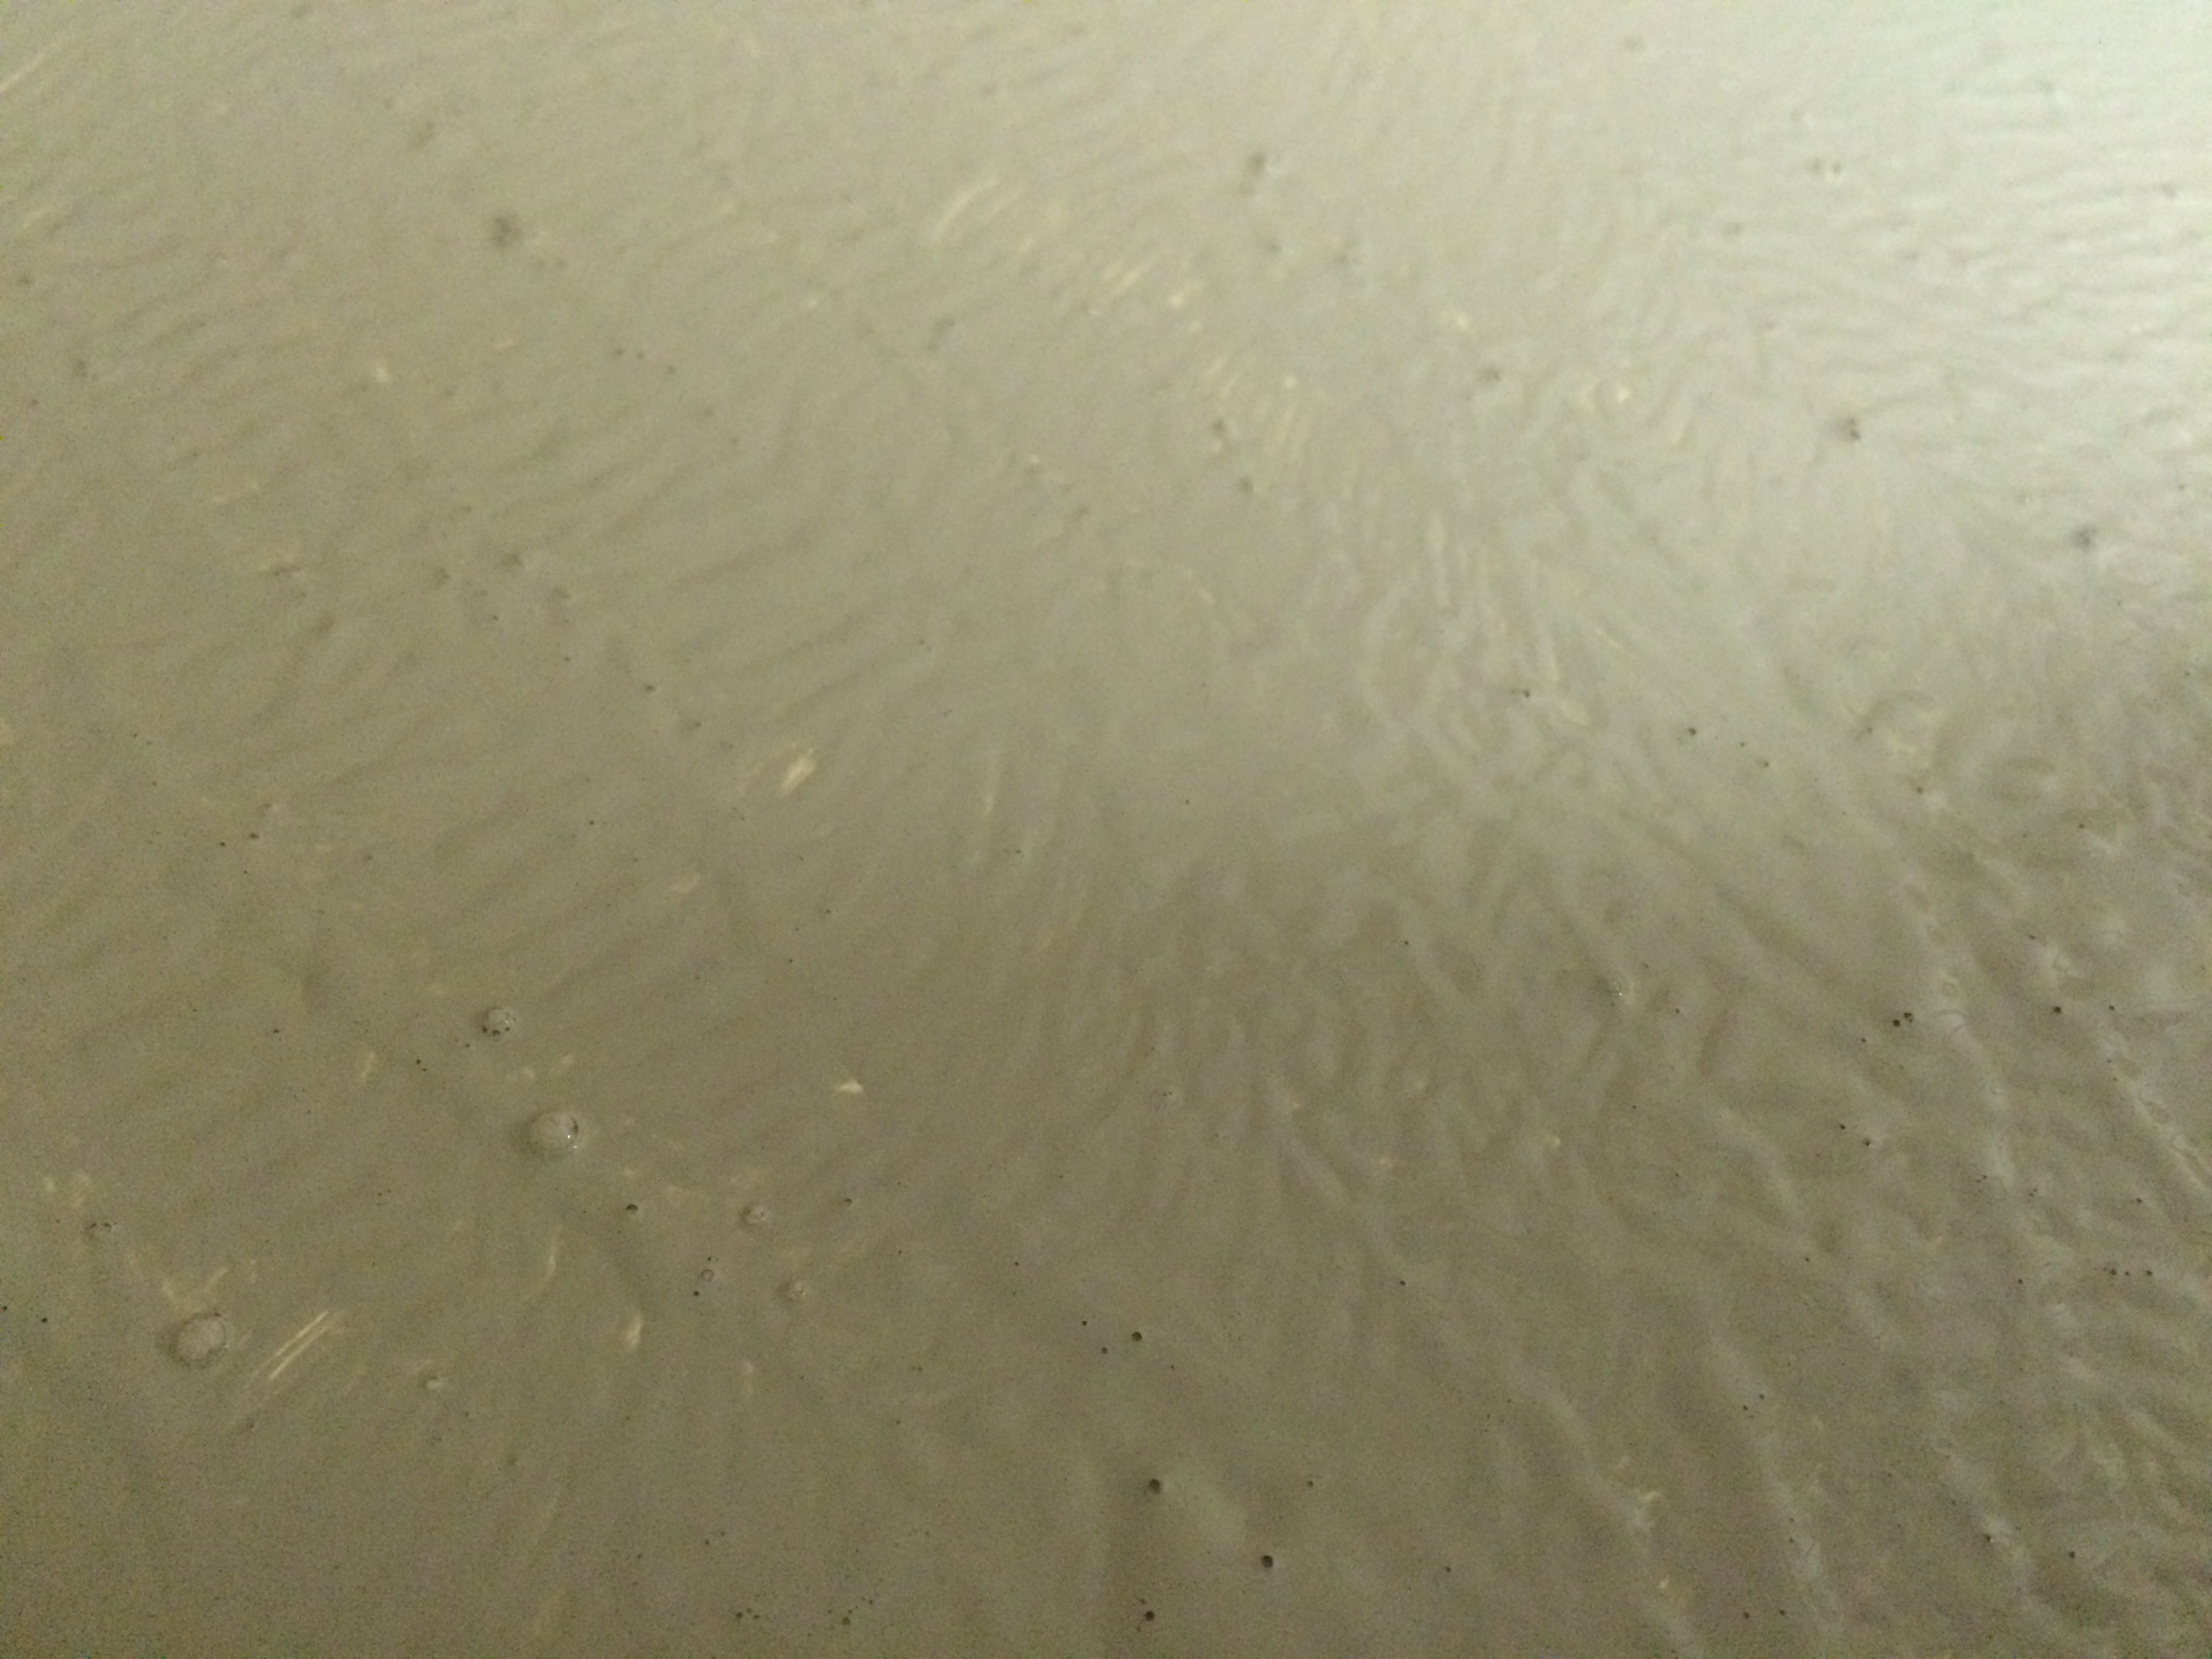
- After the paint is dry on both sides, bring the plank inside and lay out newspaper to create a work space. Paint the board with the light grey acrylic.
- While the paint is still wet, use your large paintbrush to tap the wet paint in order to create a good texture.
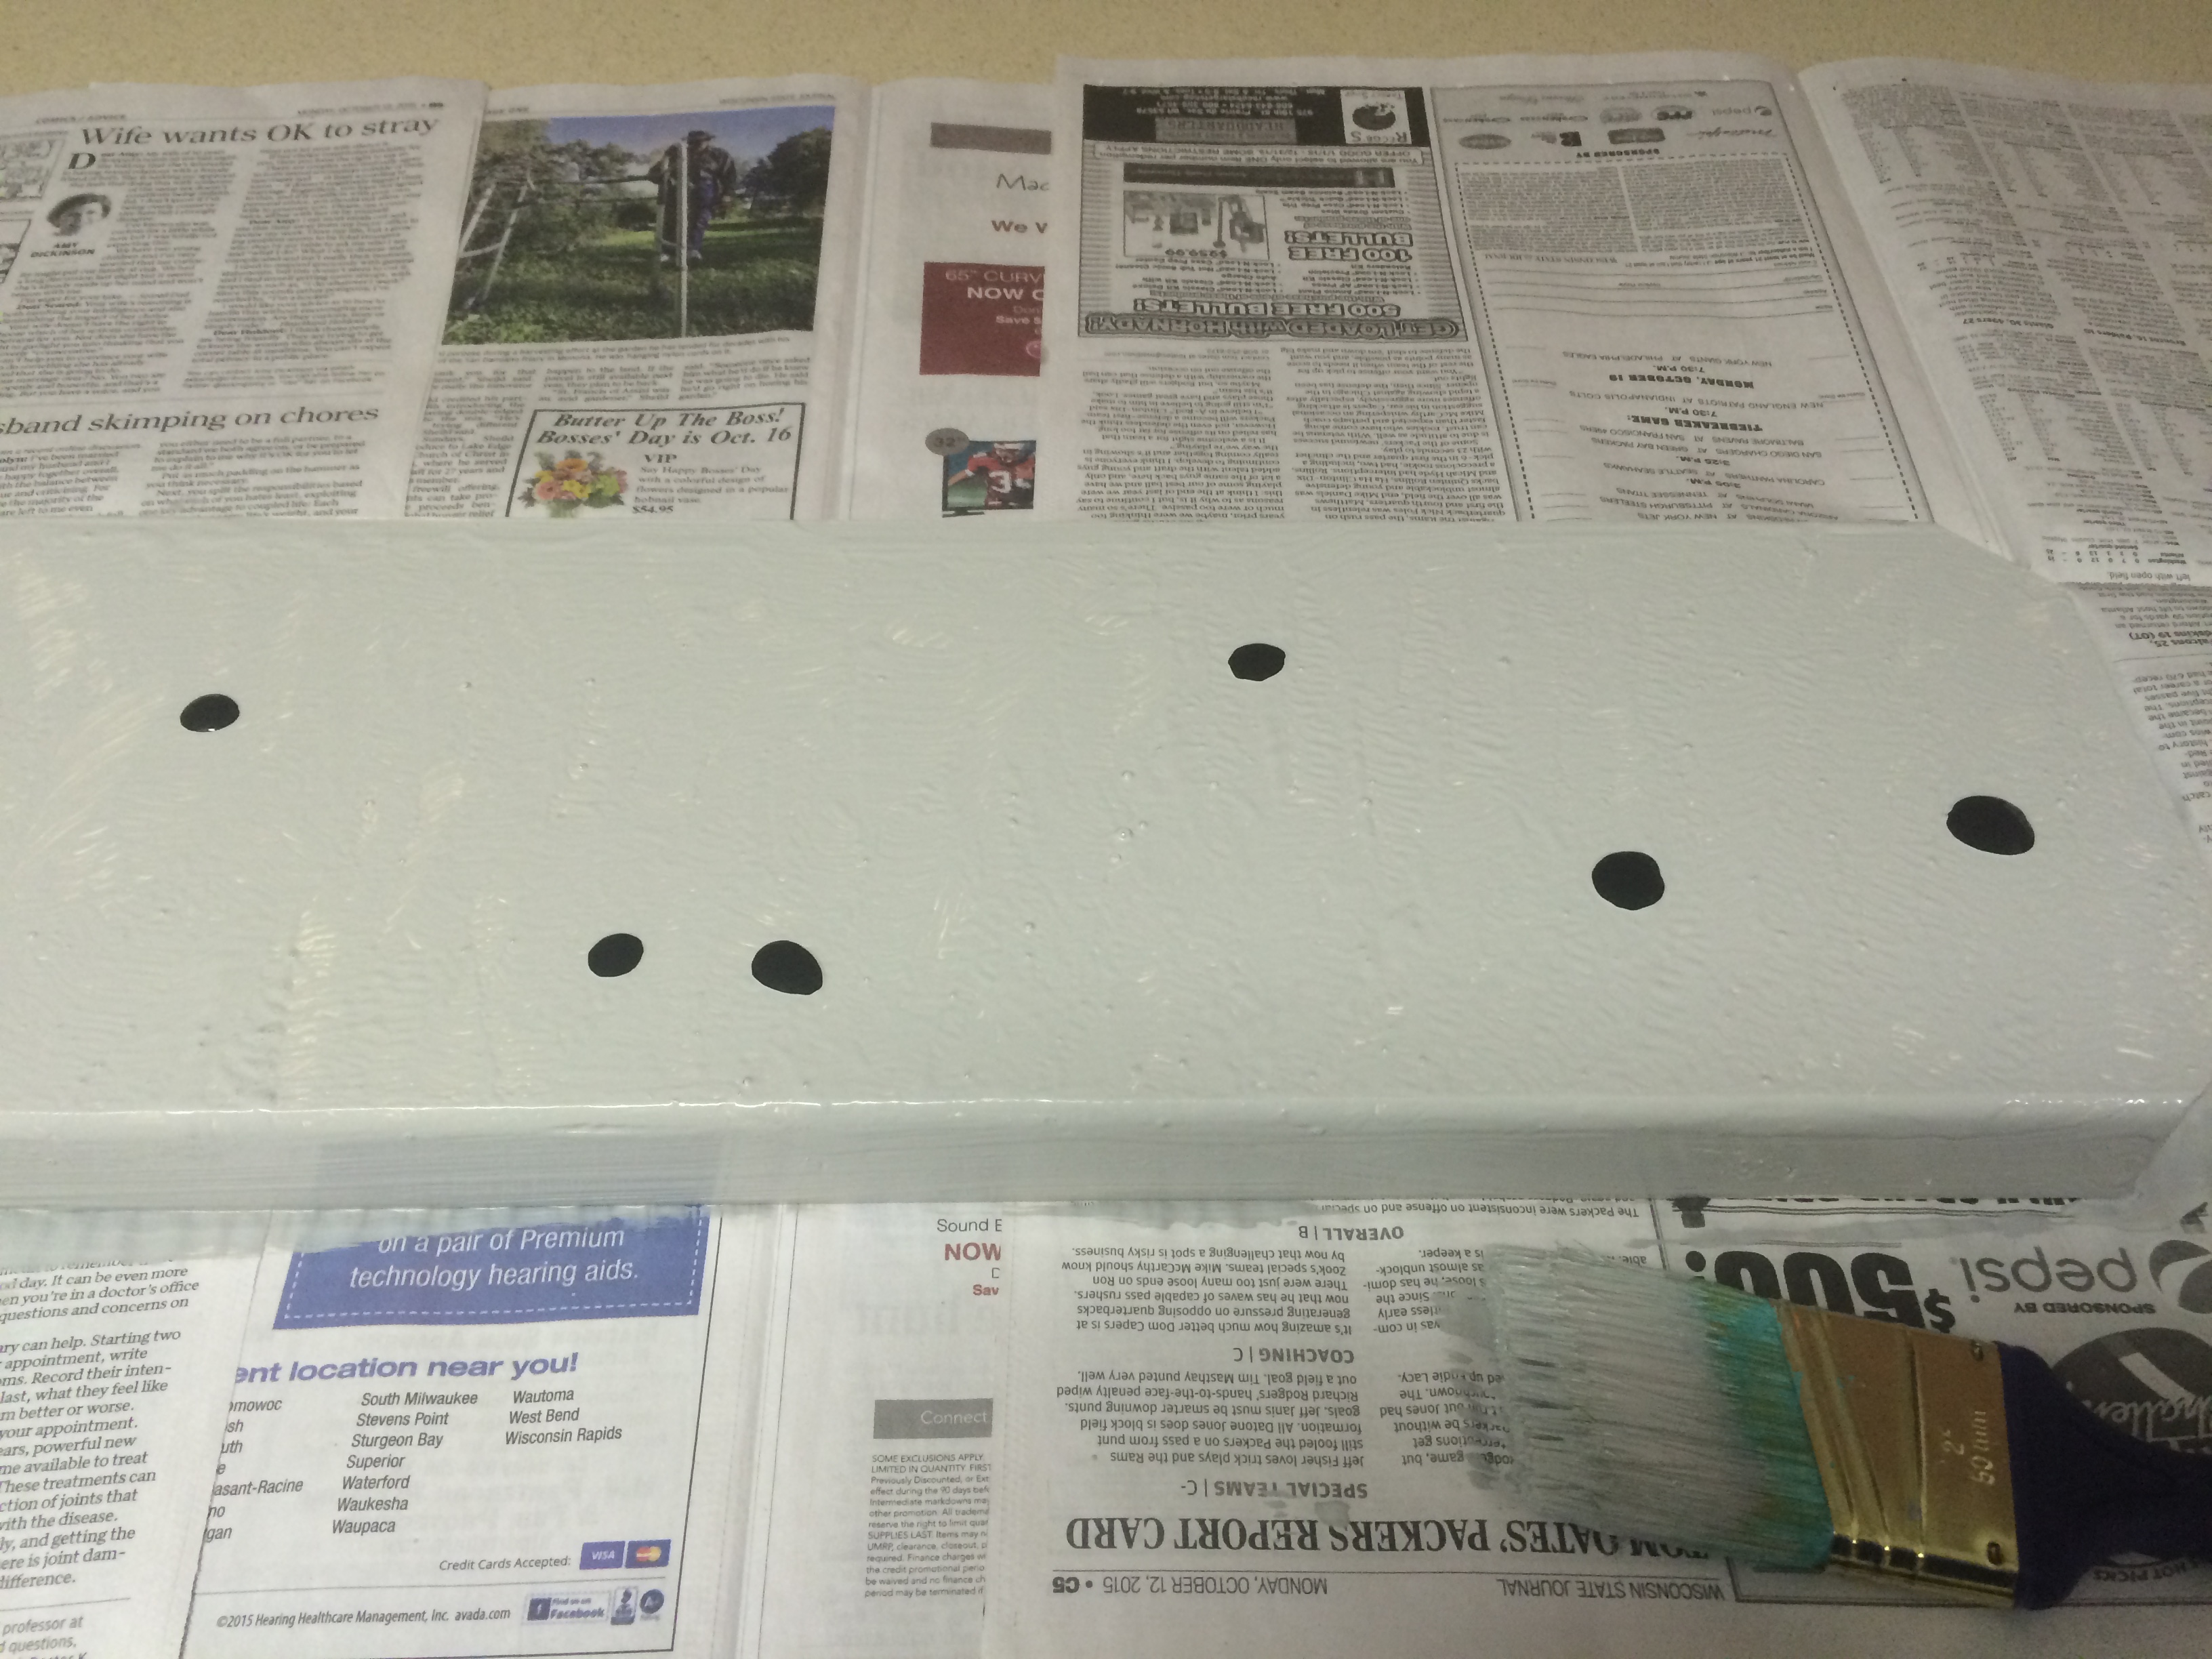
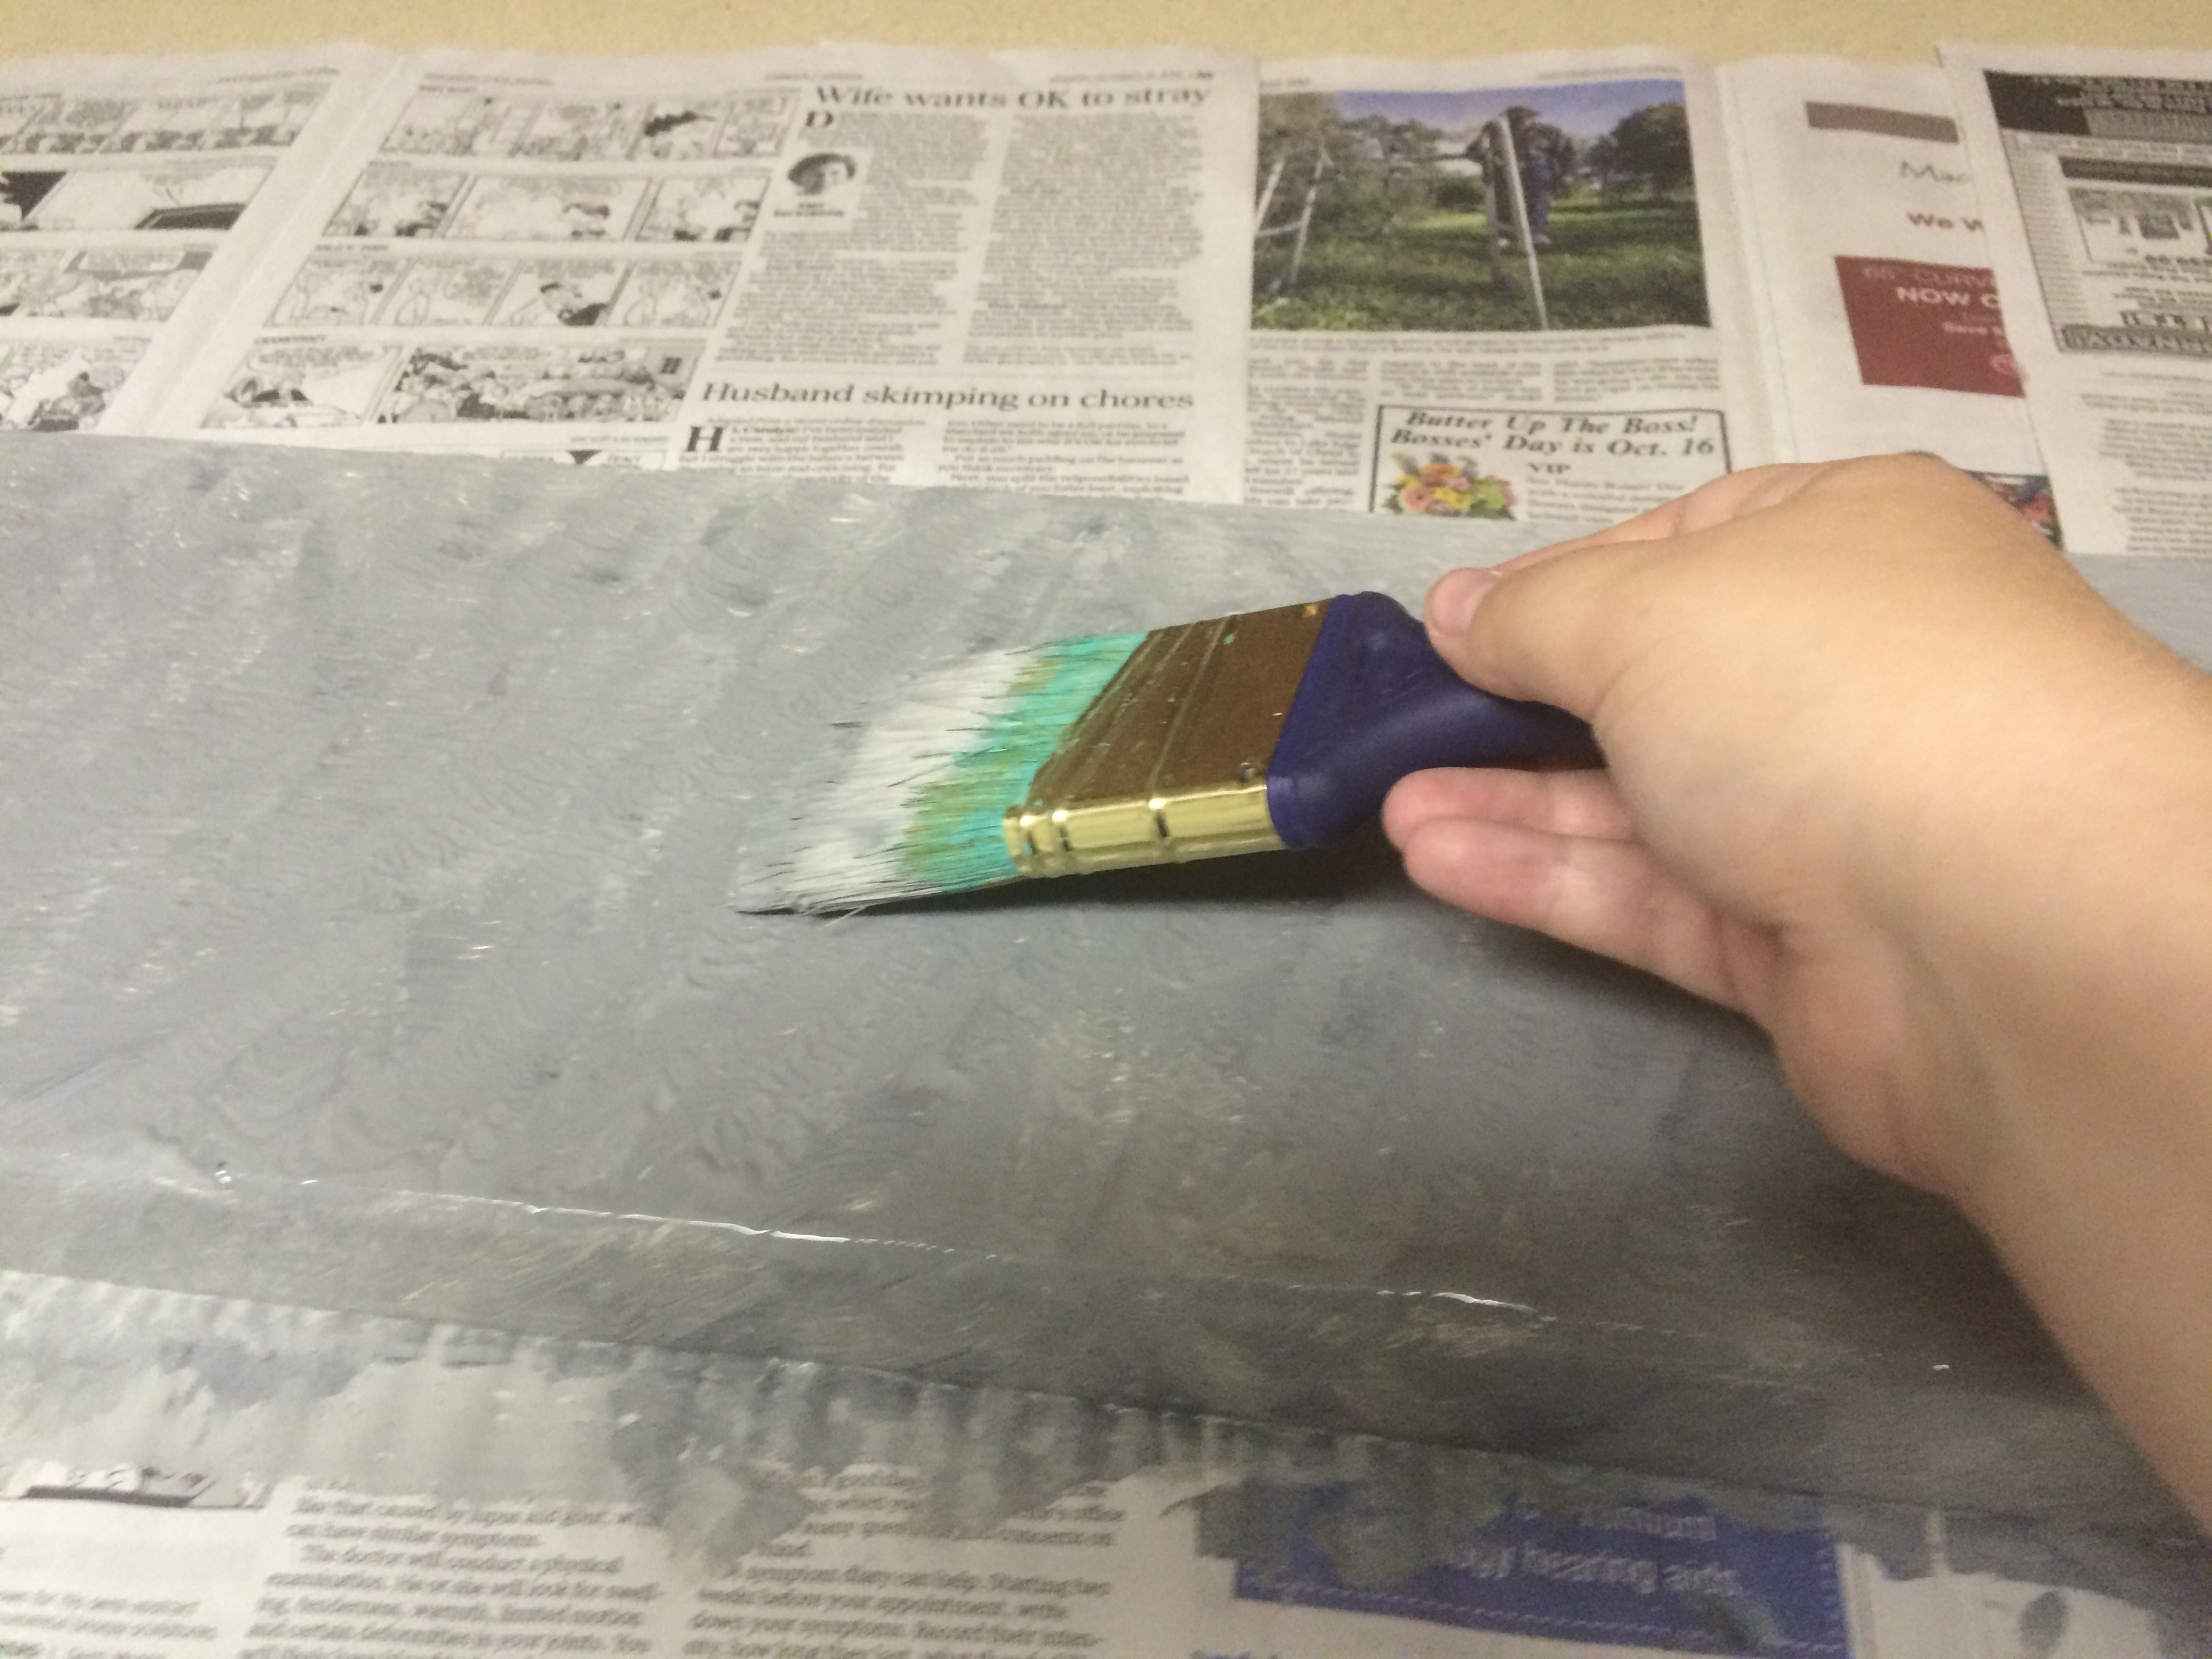
- Squirt drops of black paint onto the fresh grey paint. Use the same tapping method to mix the two colors together unevenly and add texture.
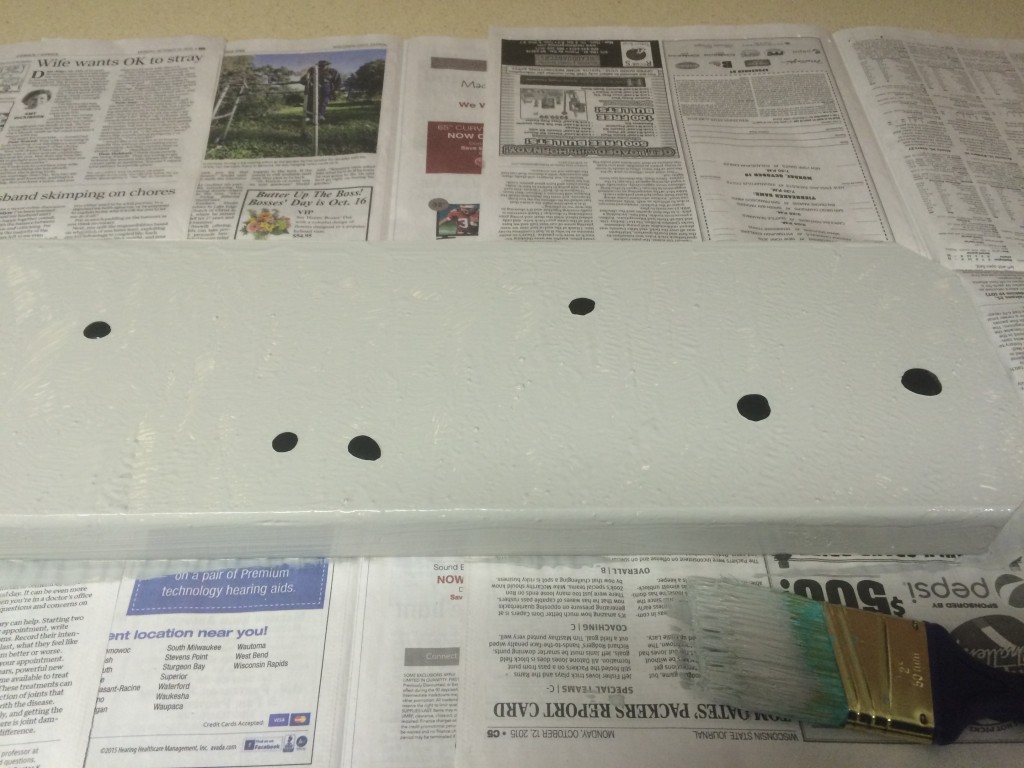
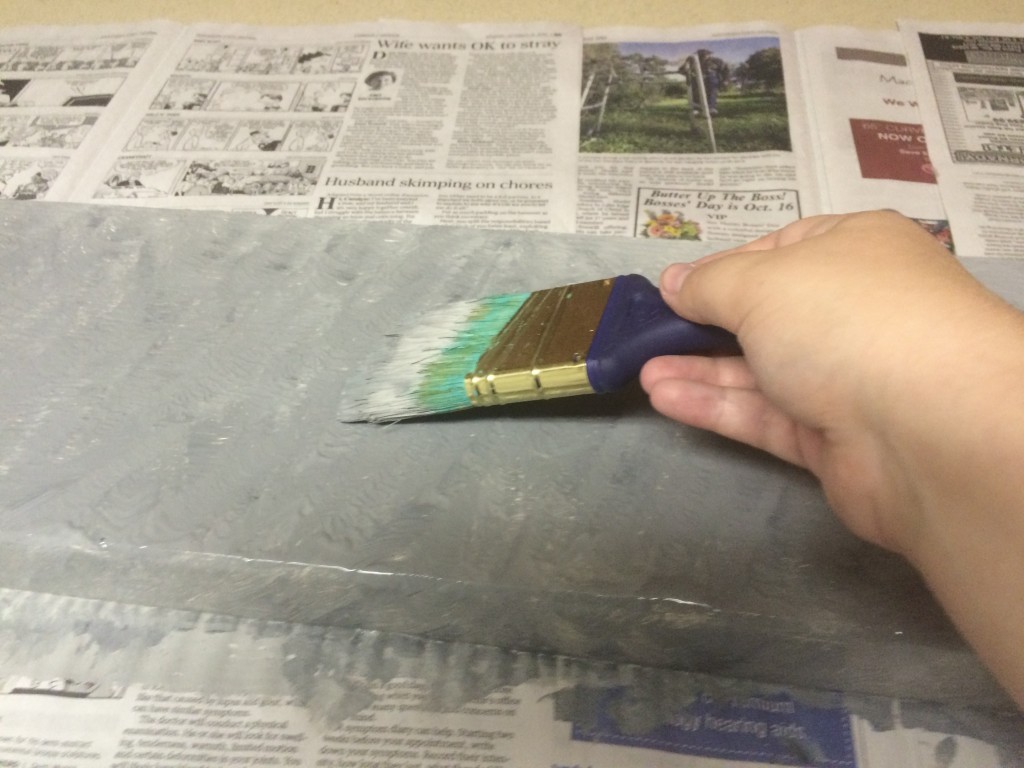
- If you want more texture, you can add a dusting of black and grey paints to your large brush to speckle the tombstone.
- Wait 30 minutes for the paint to dry slightly before adding your design. However, the paint still being a little wet will help your design blend with the background better and make it look more like cut stone.

To Copy My Design:
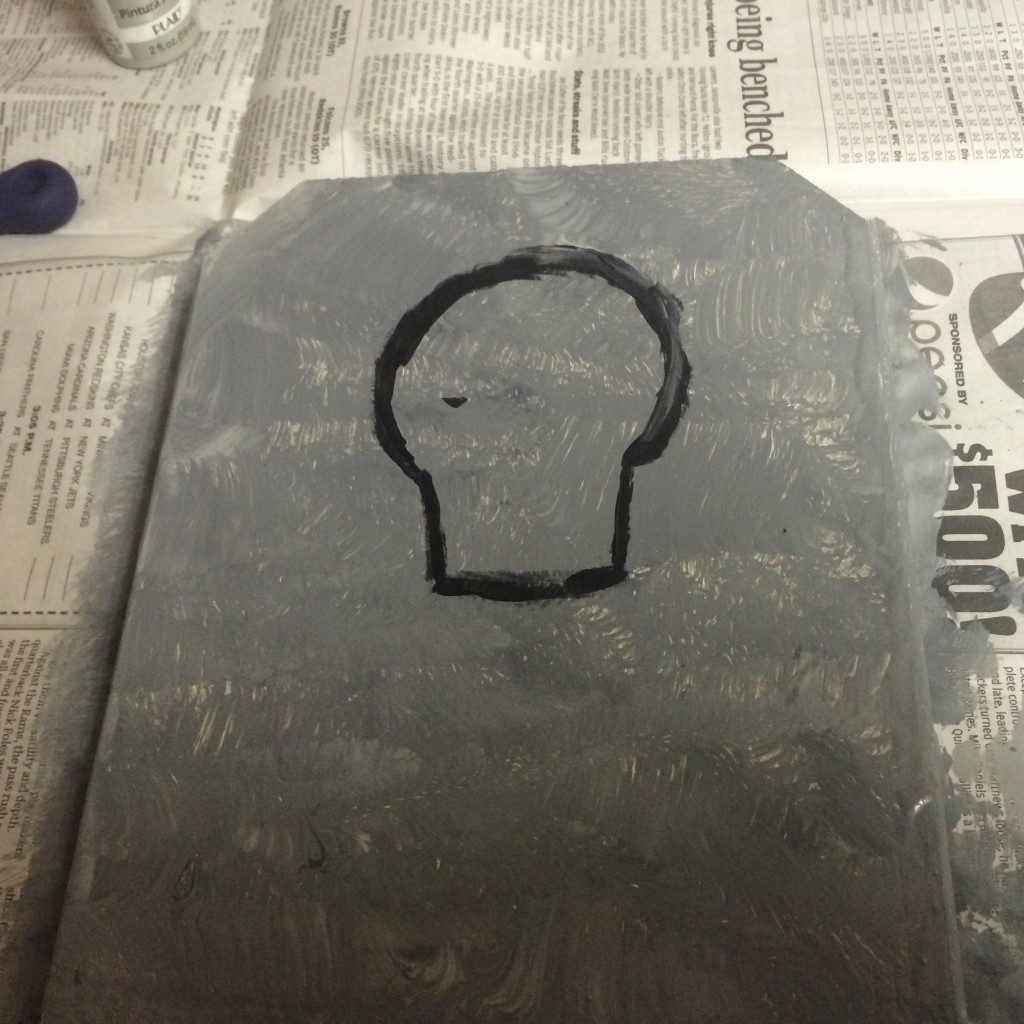
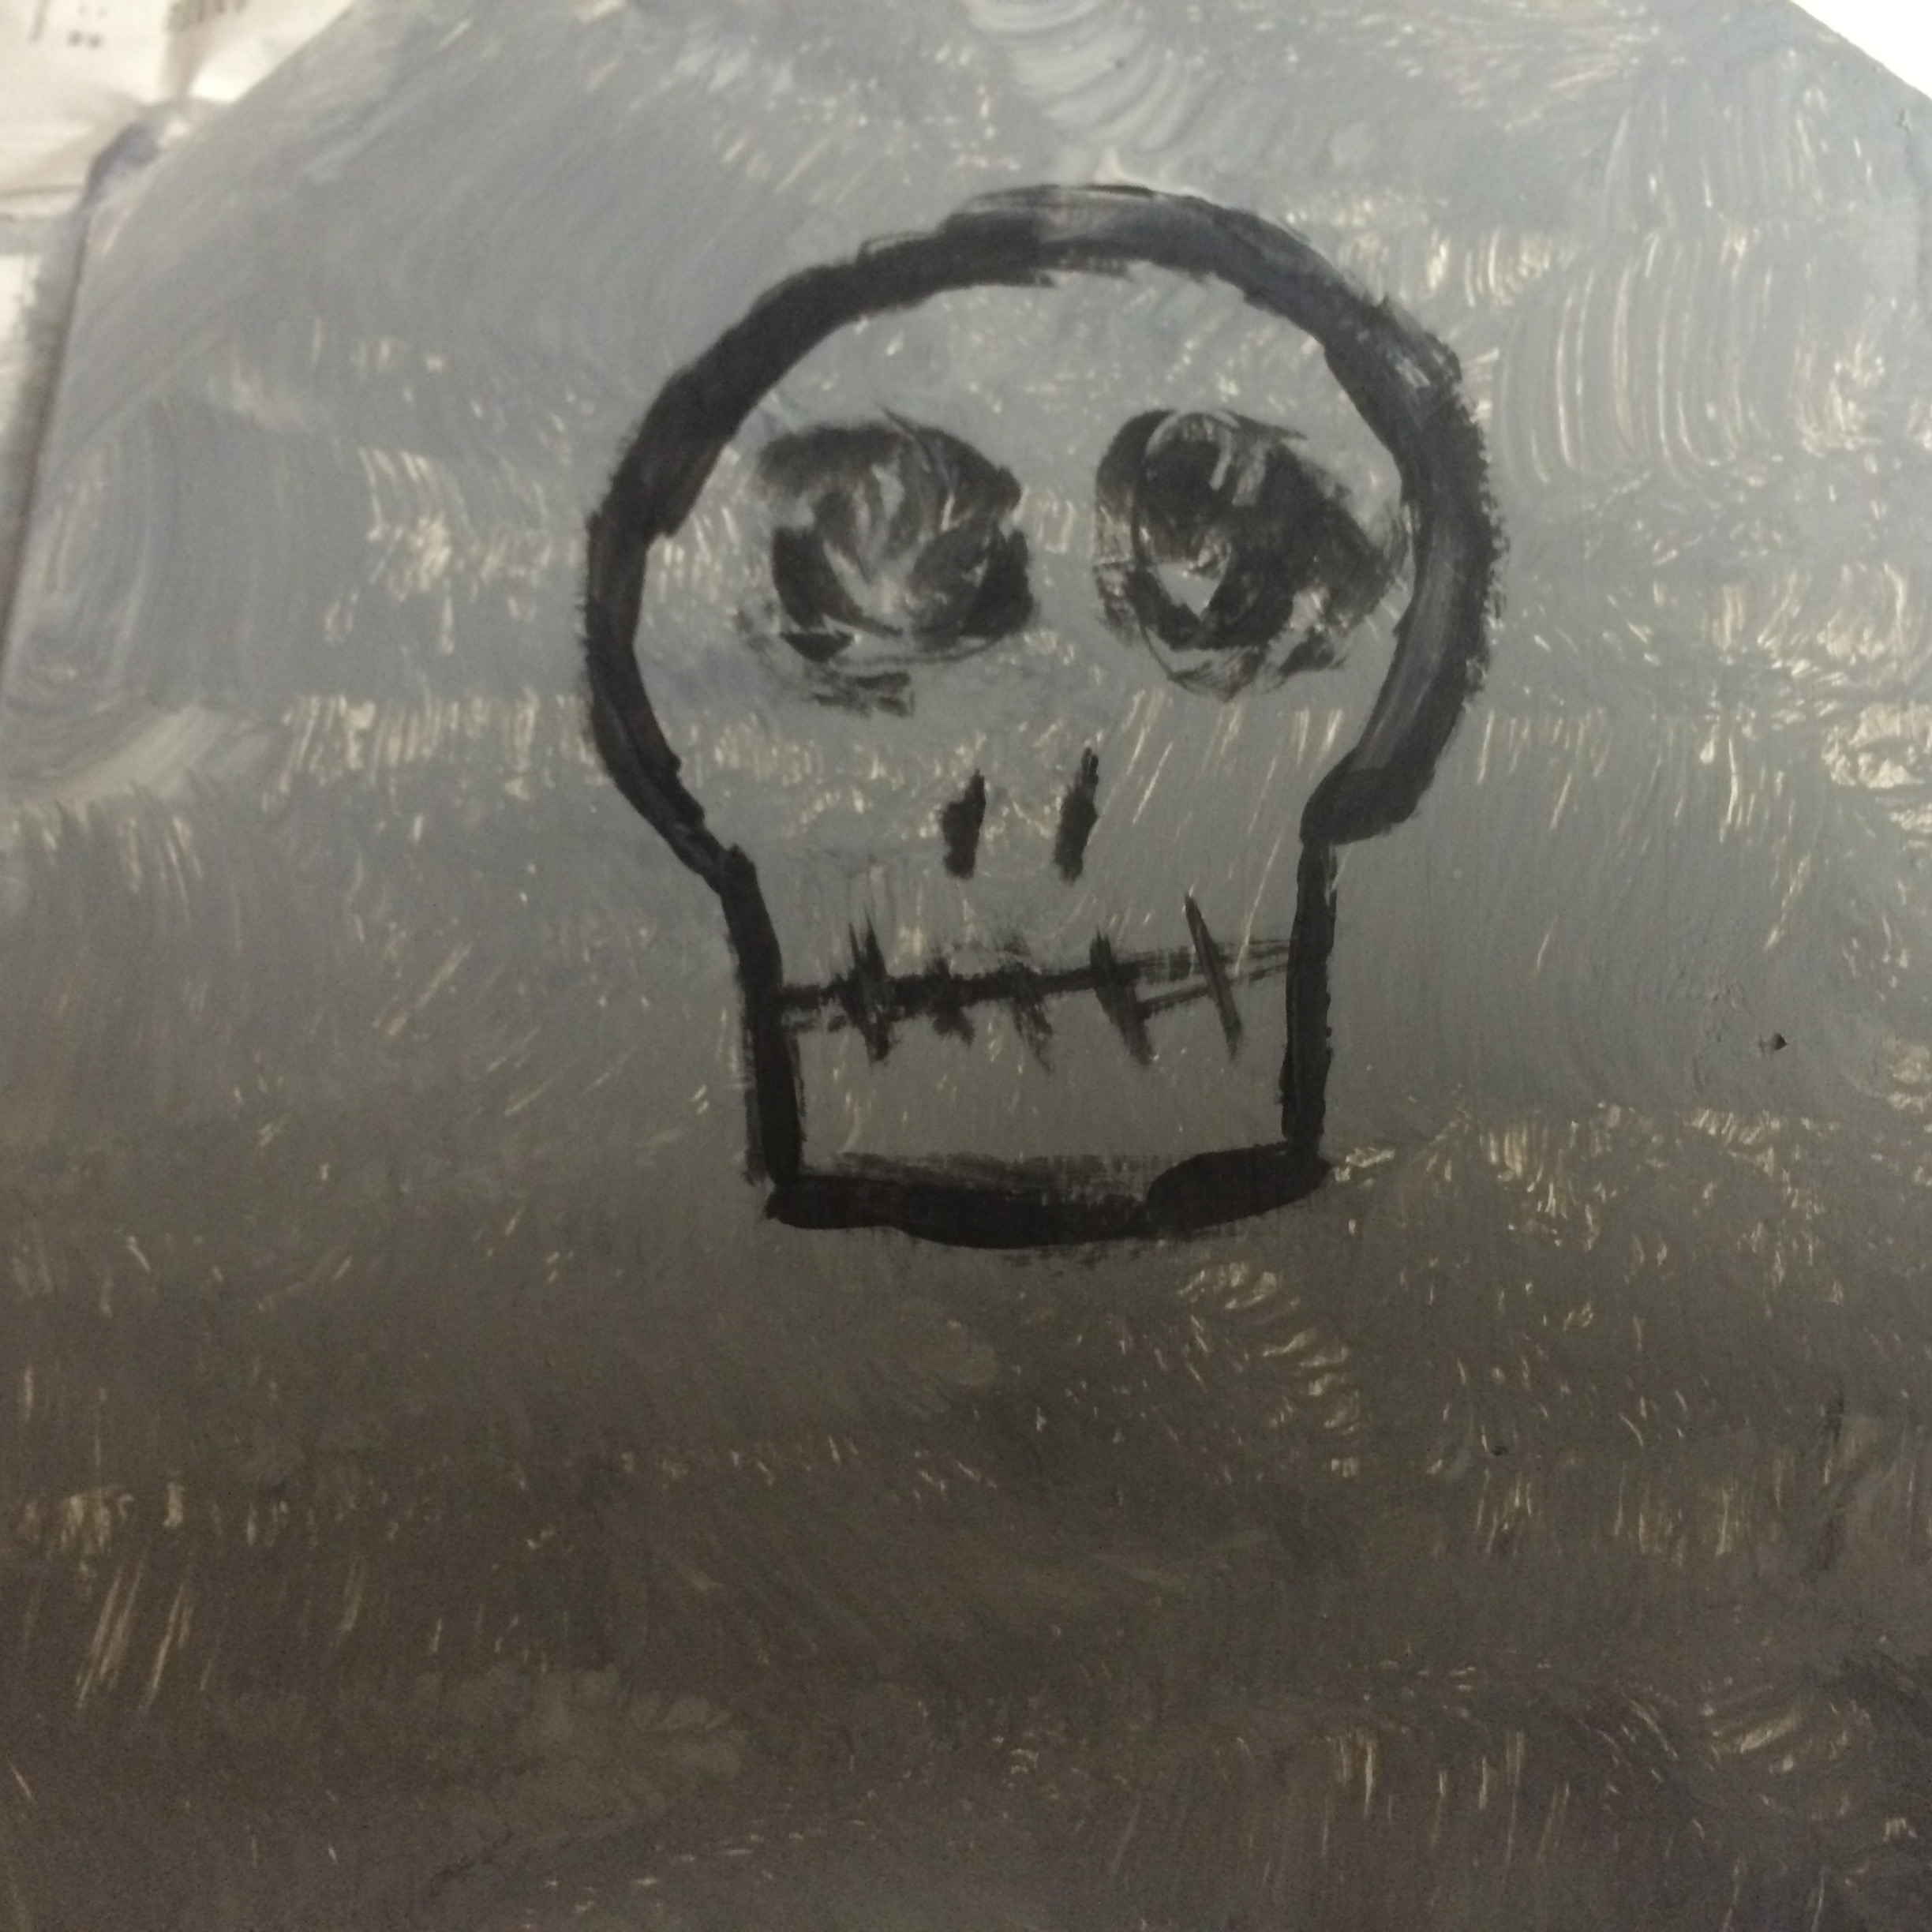
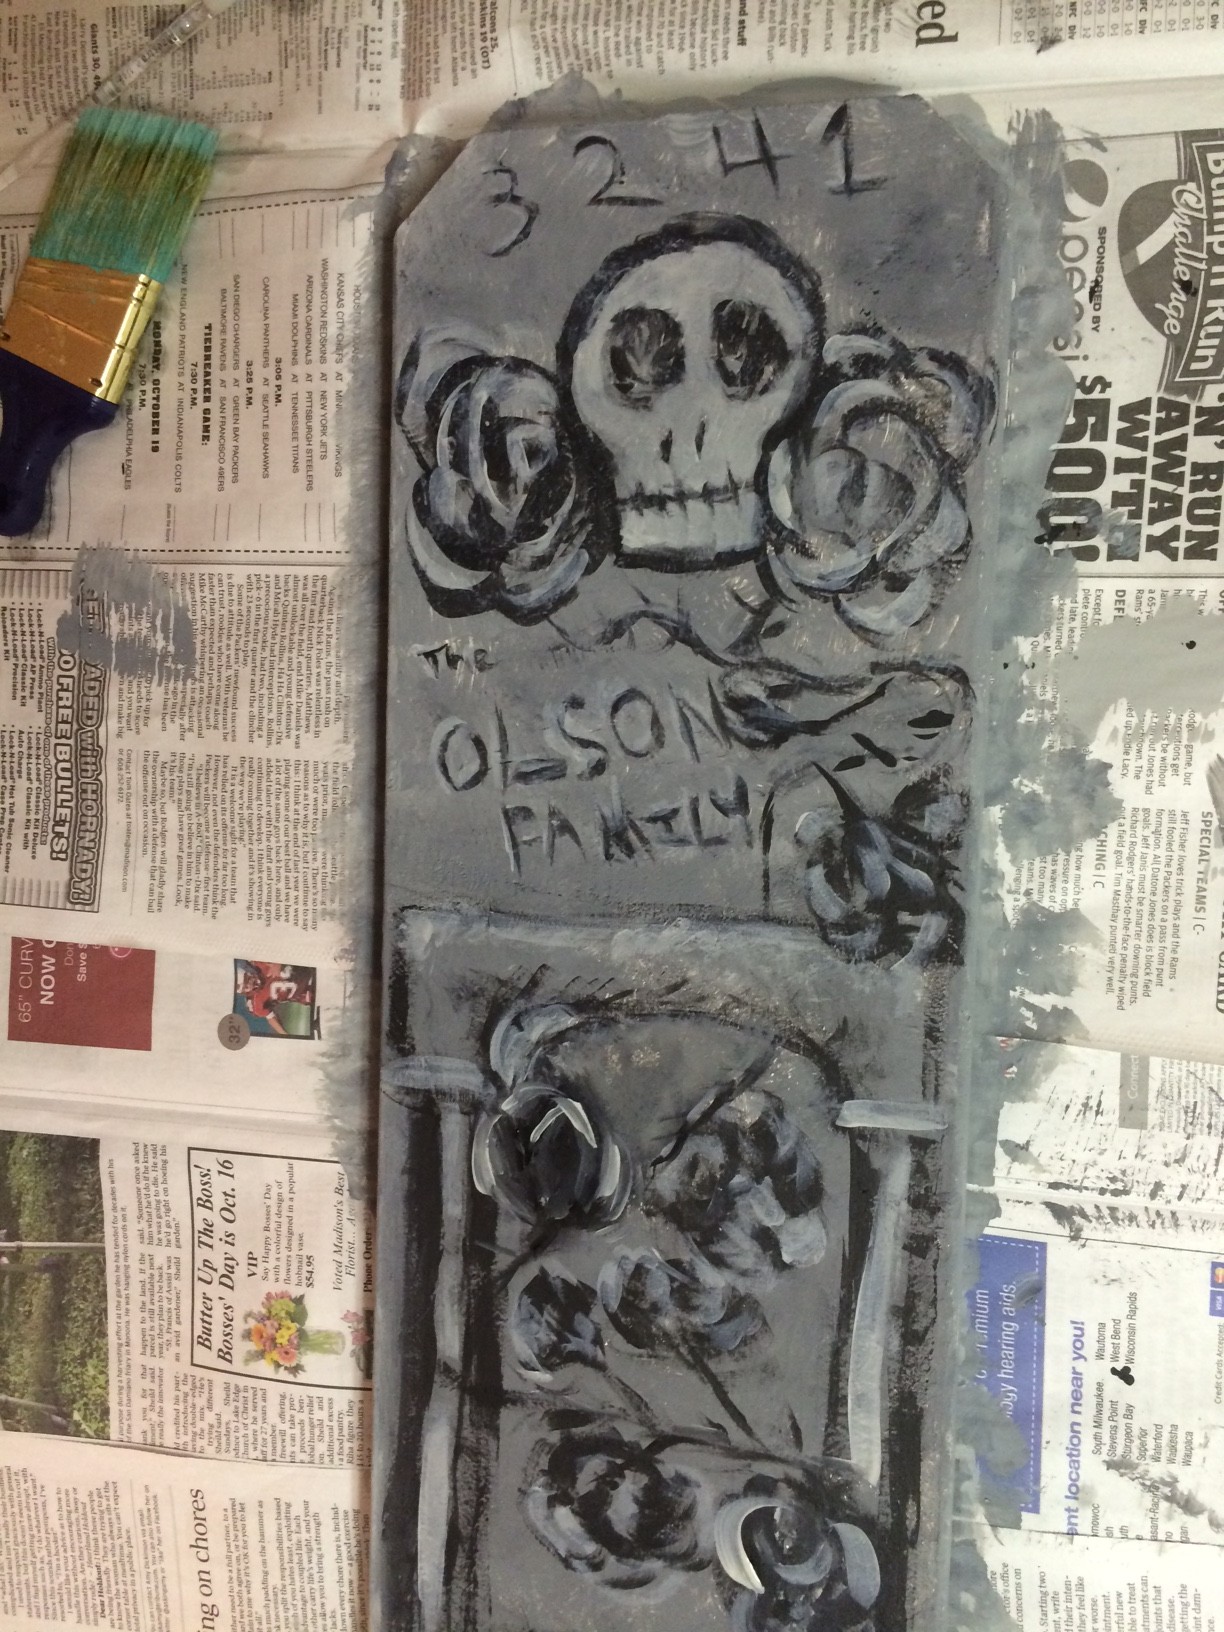
- First, paint a skull shape at the top center of the tombstone. An easy way to do this is to use the small angled paintbrush to paint most of a circle, then add a box shape at the bottom for the jaw.
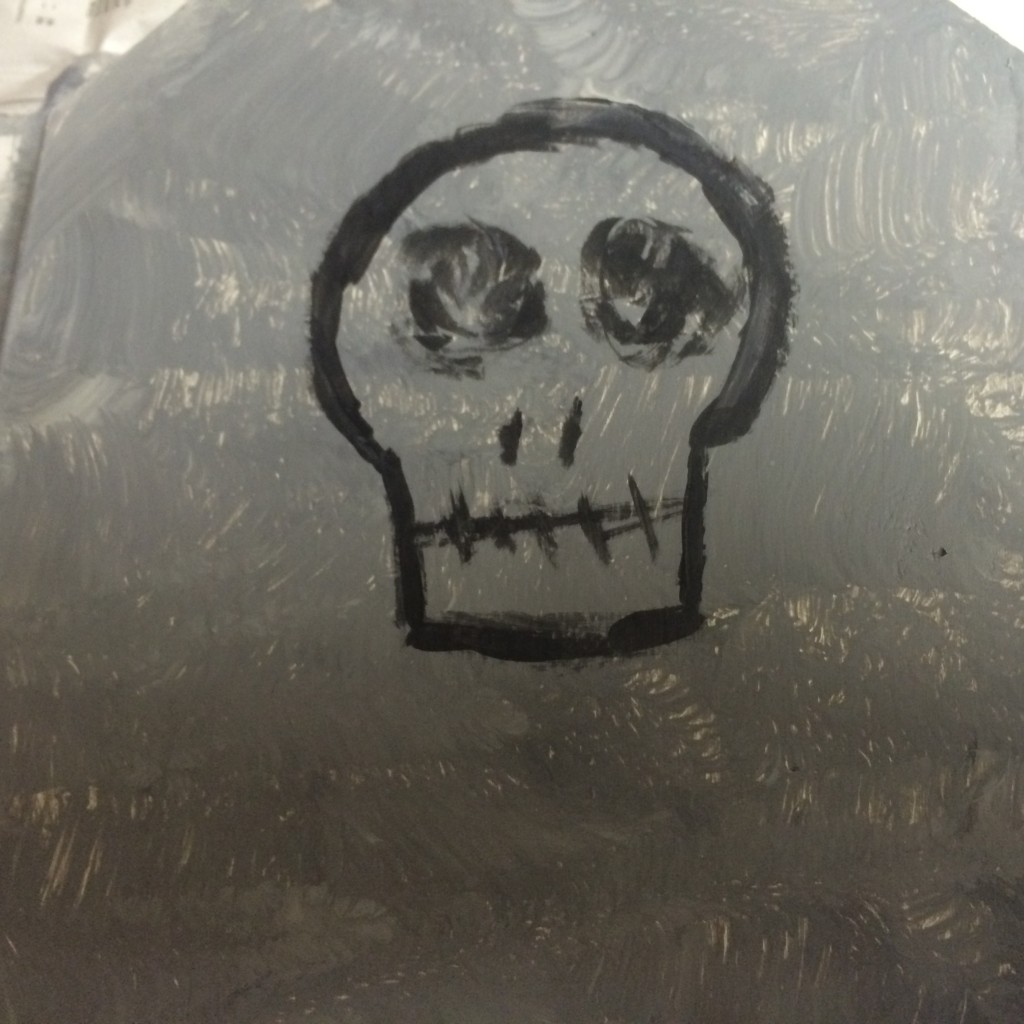
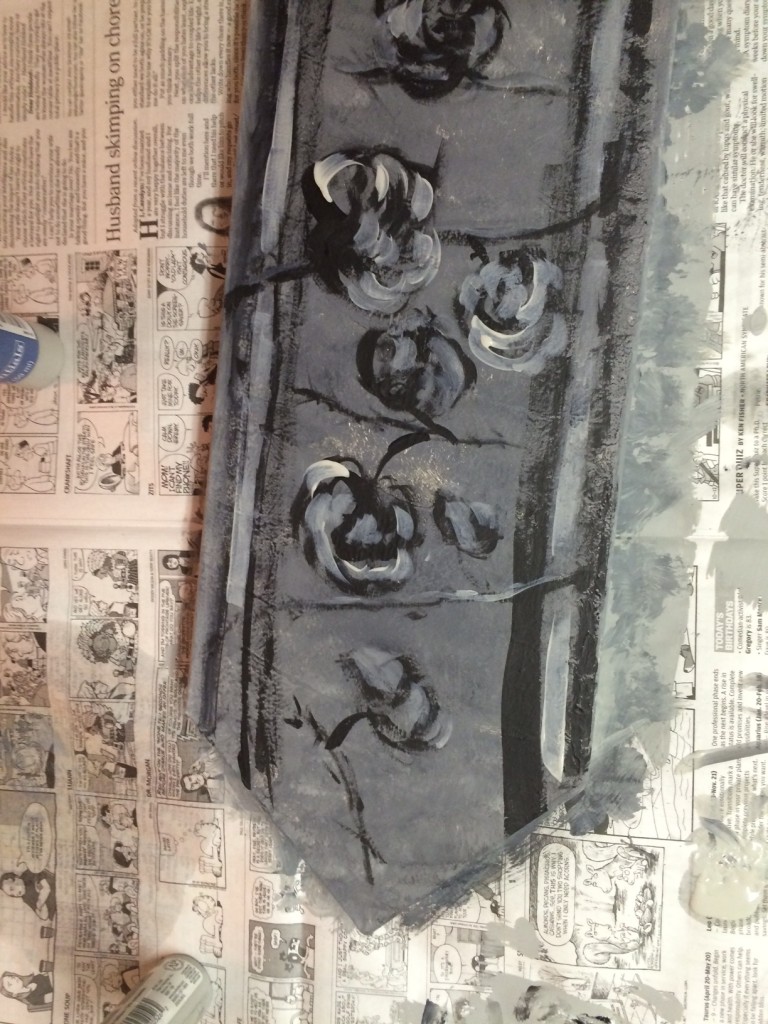
- I added two rosettes for eyes. The easy way to do this is to just paint curved lines in a group so that they resemble a floral shape. Next, add two slits for nostrils and a line with dashes in it for teeth.
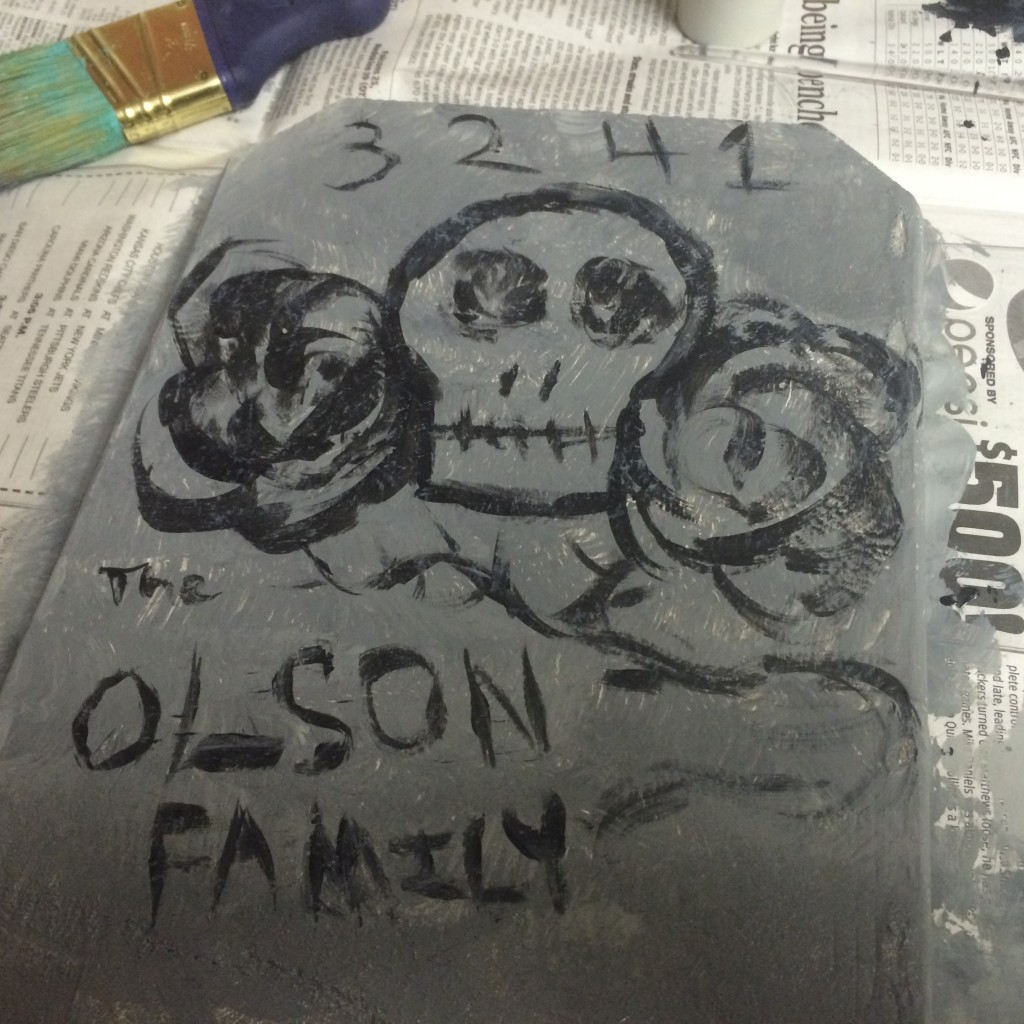
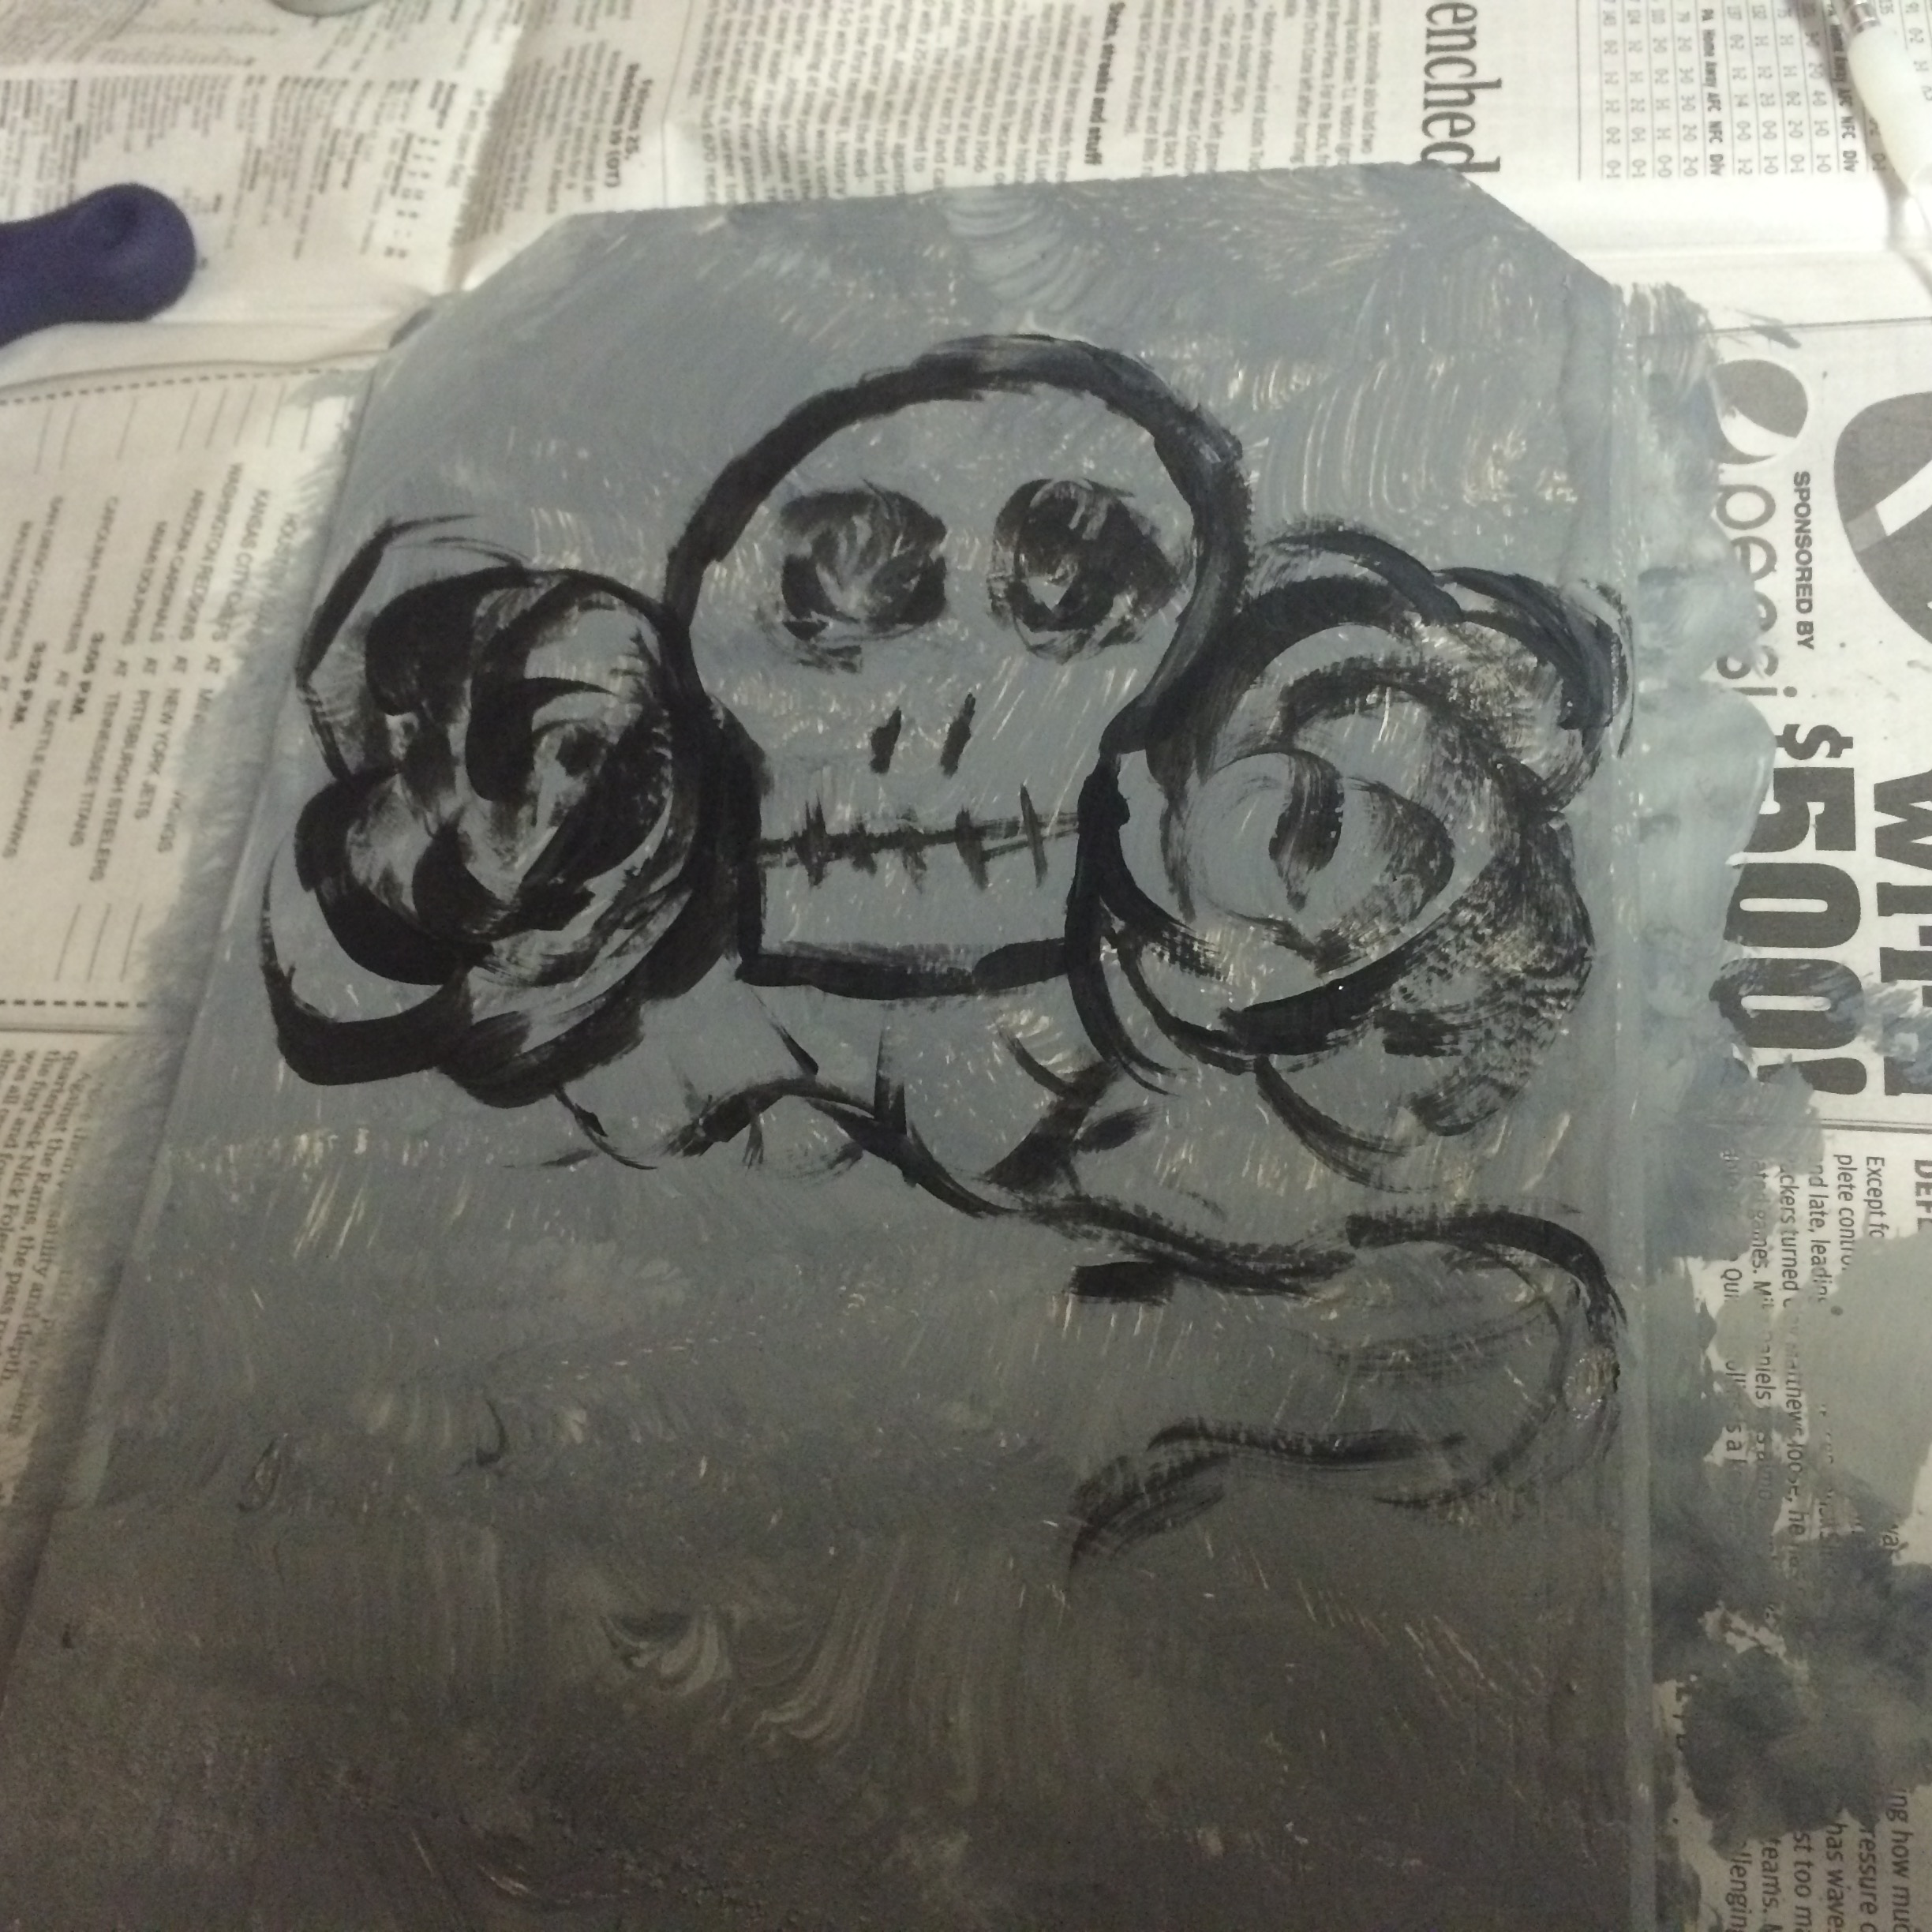
- Next, I added two larger rosettes on either side of the skull using the same curved line method I used for the eyes. Then I connected them with a curved line for a stem and added little dashes for the thorns.

- Above the skull, write your address numbers or a year of your choice. If you aren’t happy with your lettering the first time, don’t worry. You can always paint over it, and the fact that the paint’s still a little wet will help you blend in your mistakes.
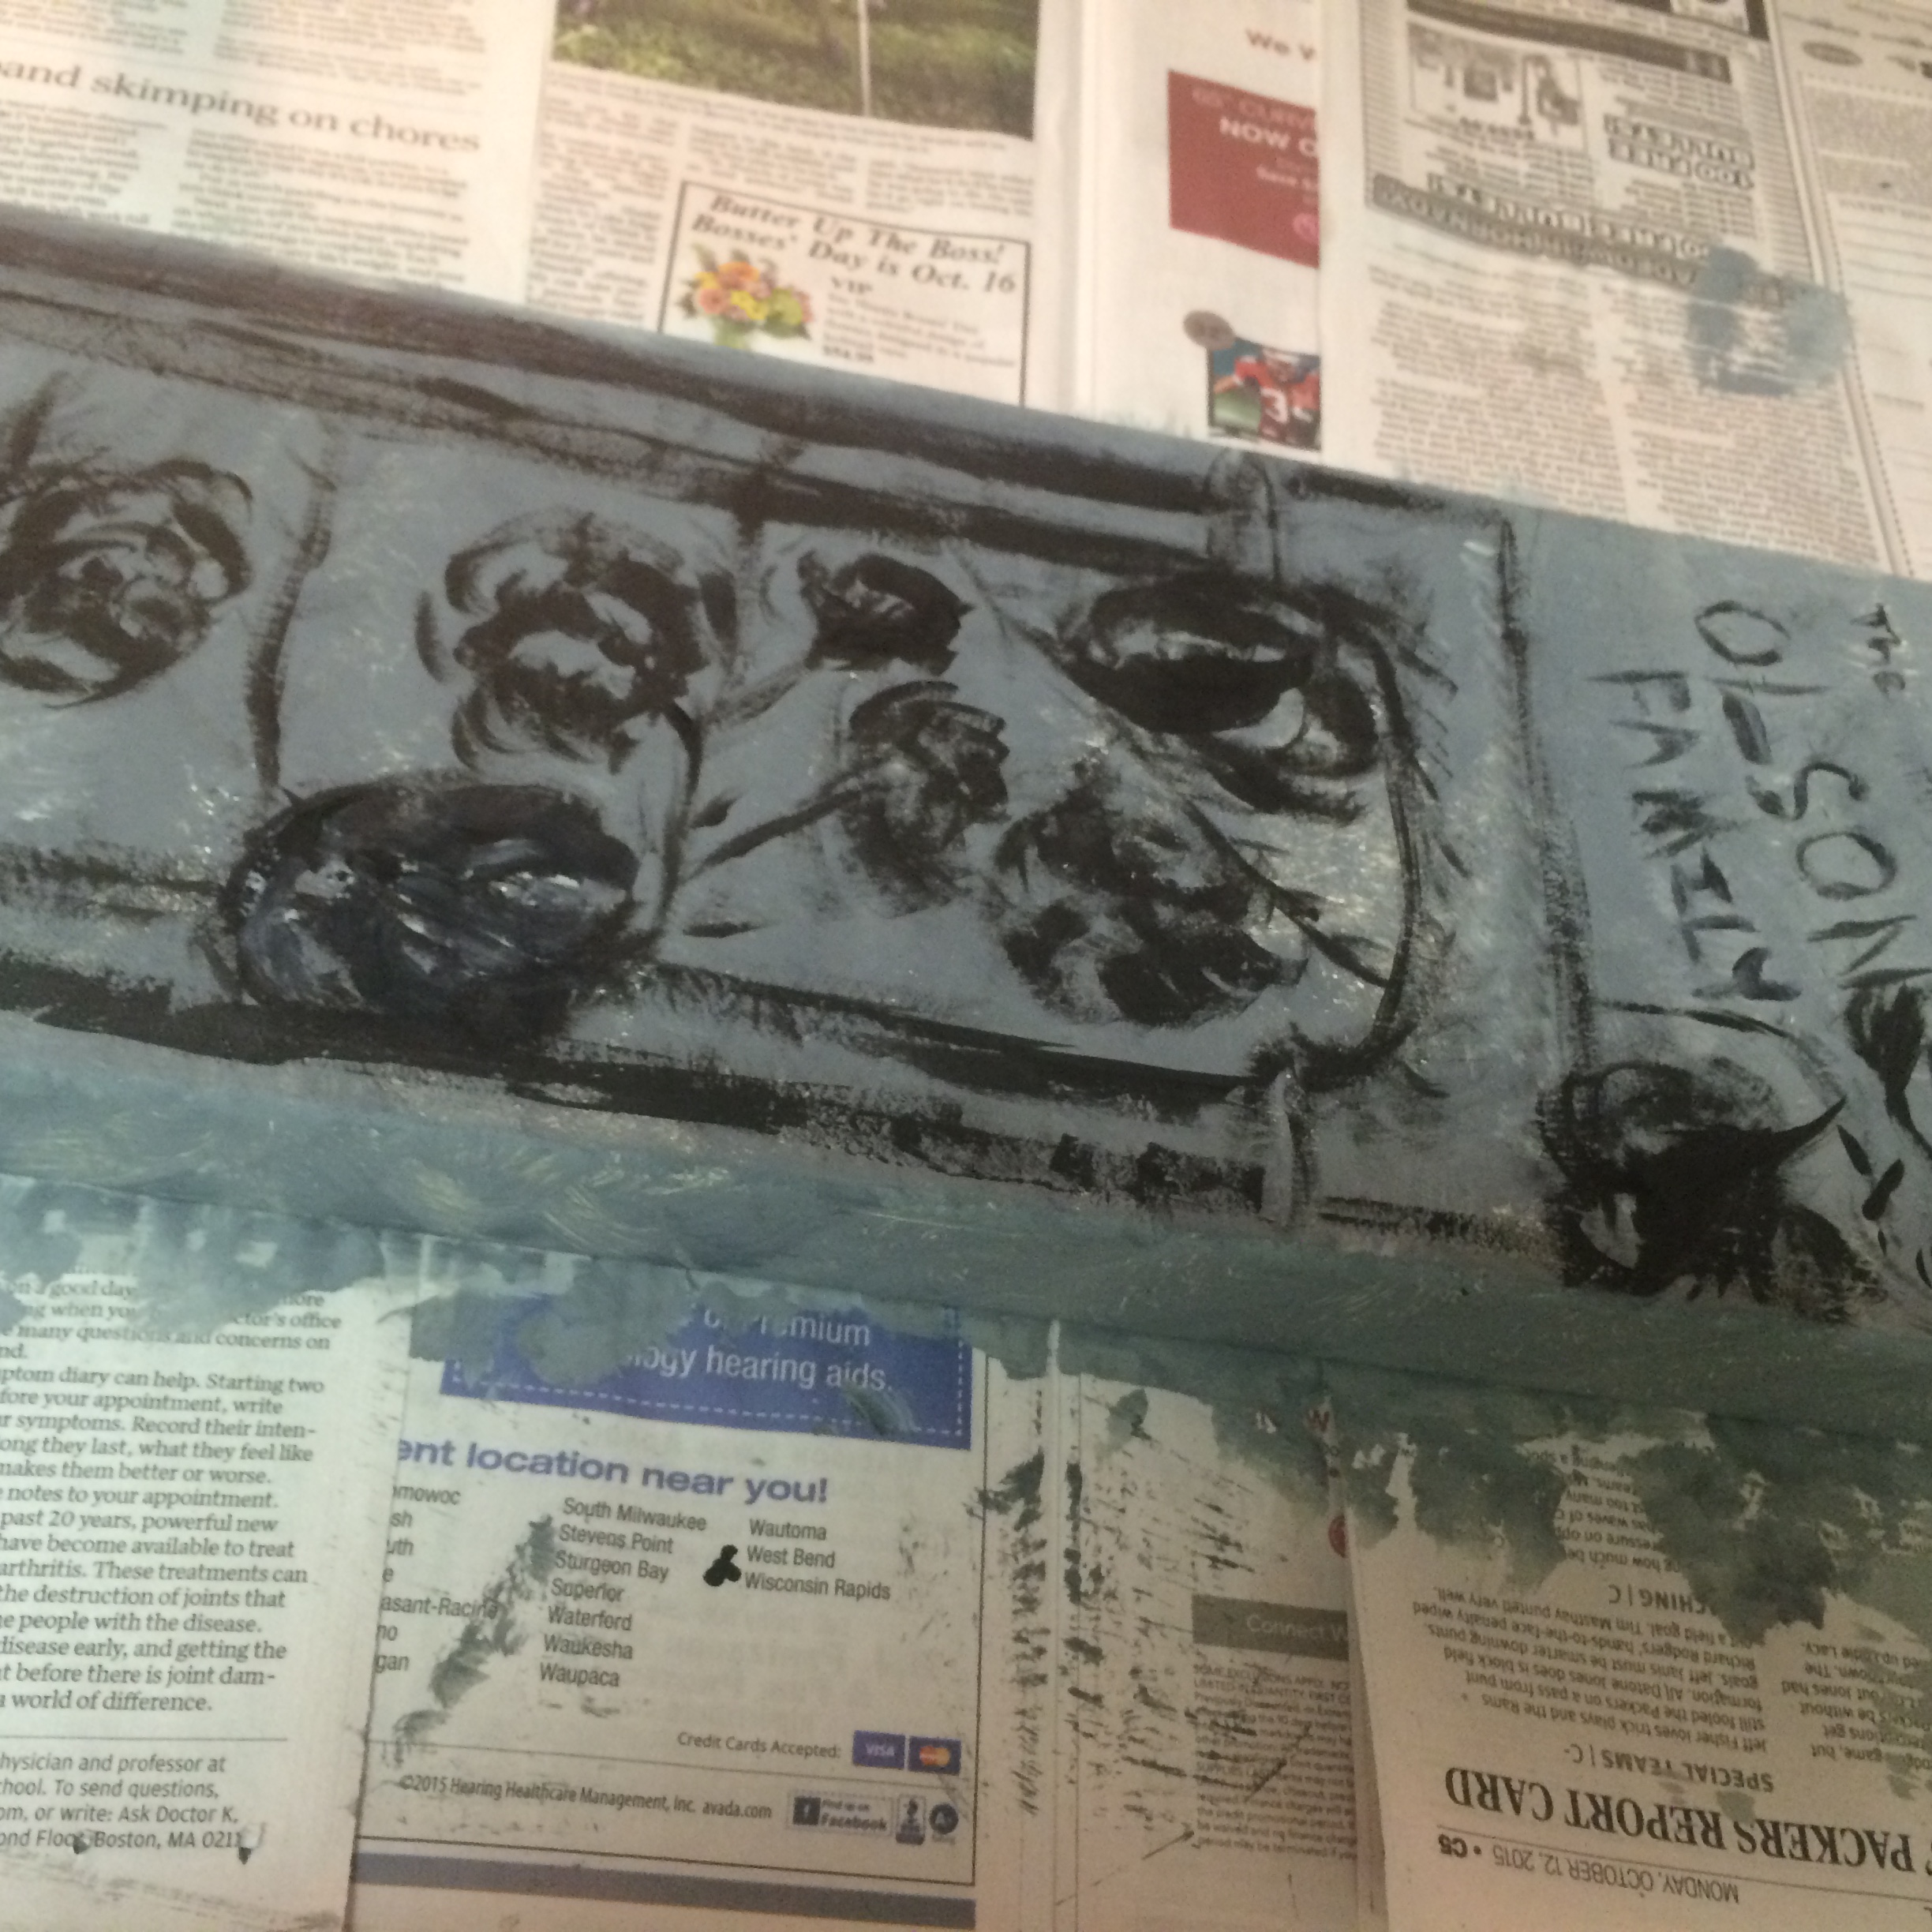
- Add lettering under the skull and rosettes, such as a name, “The ___________ Family”, or another phrase.
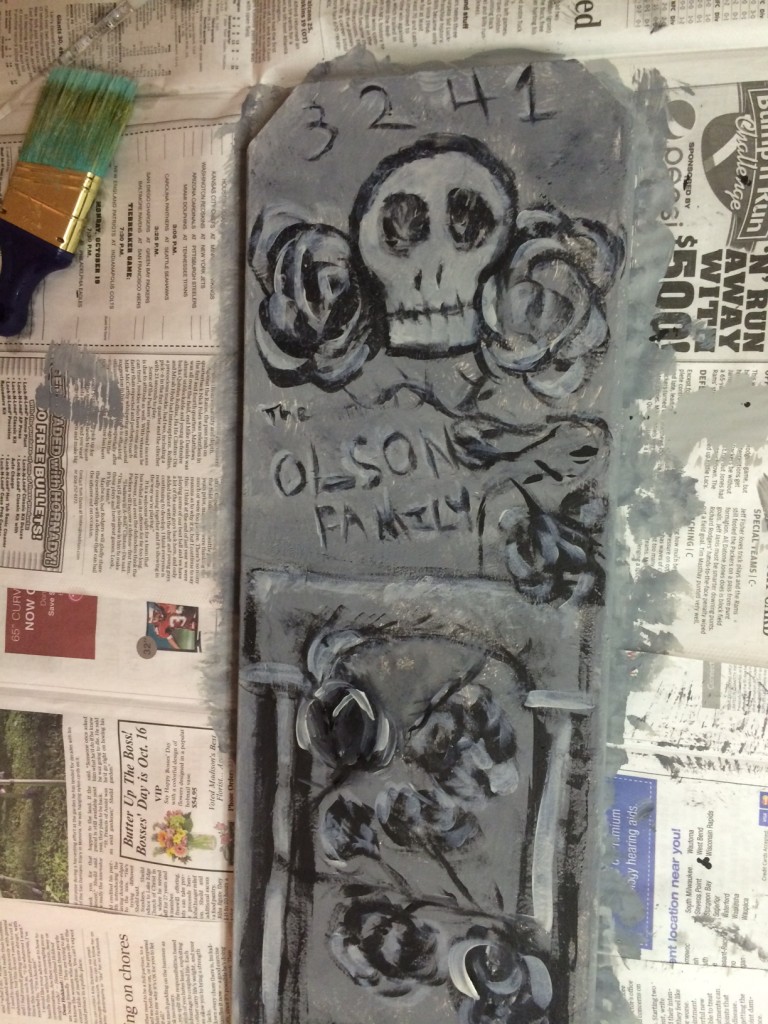
- To make the columns, first paint the archway under the lettering. Then, outline the columns underneath the arch. Use a light coat of black to shade the inside of the arch and the sides of the columns.
- To add rose vine, extend the stem from the two rosettes by the skull so that it winds around the columns. Add more rosettes and thorns along the stem as you see fit.

- Finally, Take your light grey and use it to paint the skull. Also use it to highlight the tops and either the left or right side of the letters and numbers, the center of the columns, the top of the arch, and the petals in the rosettes.
- Wait until completely dry until turning over to paint the back. I used the same method to paint a mottled stone back as I did on the front.
- When tombstone is completely dry, place outside.


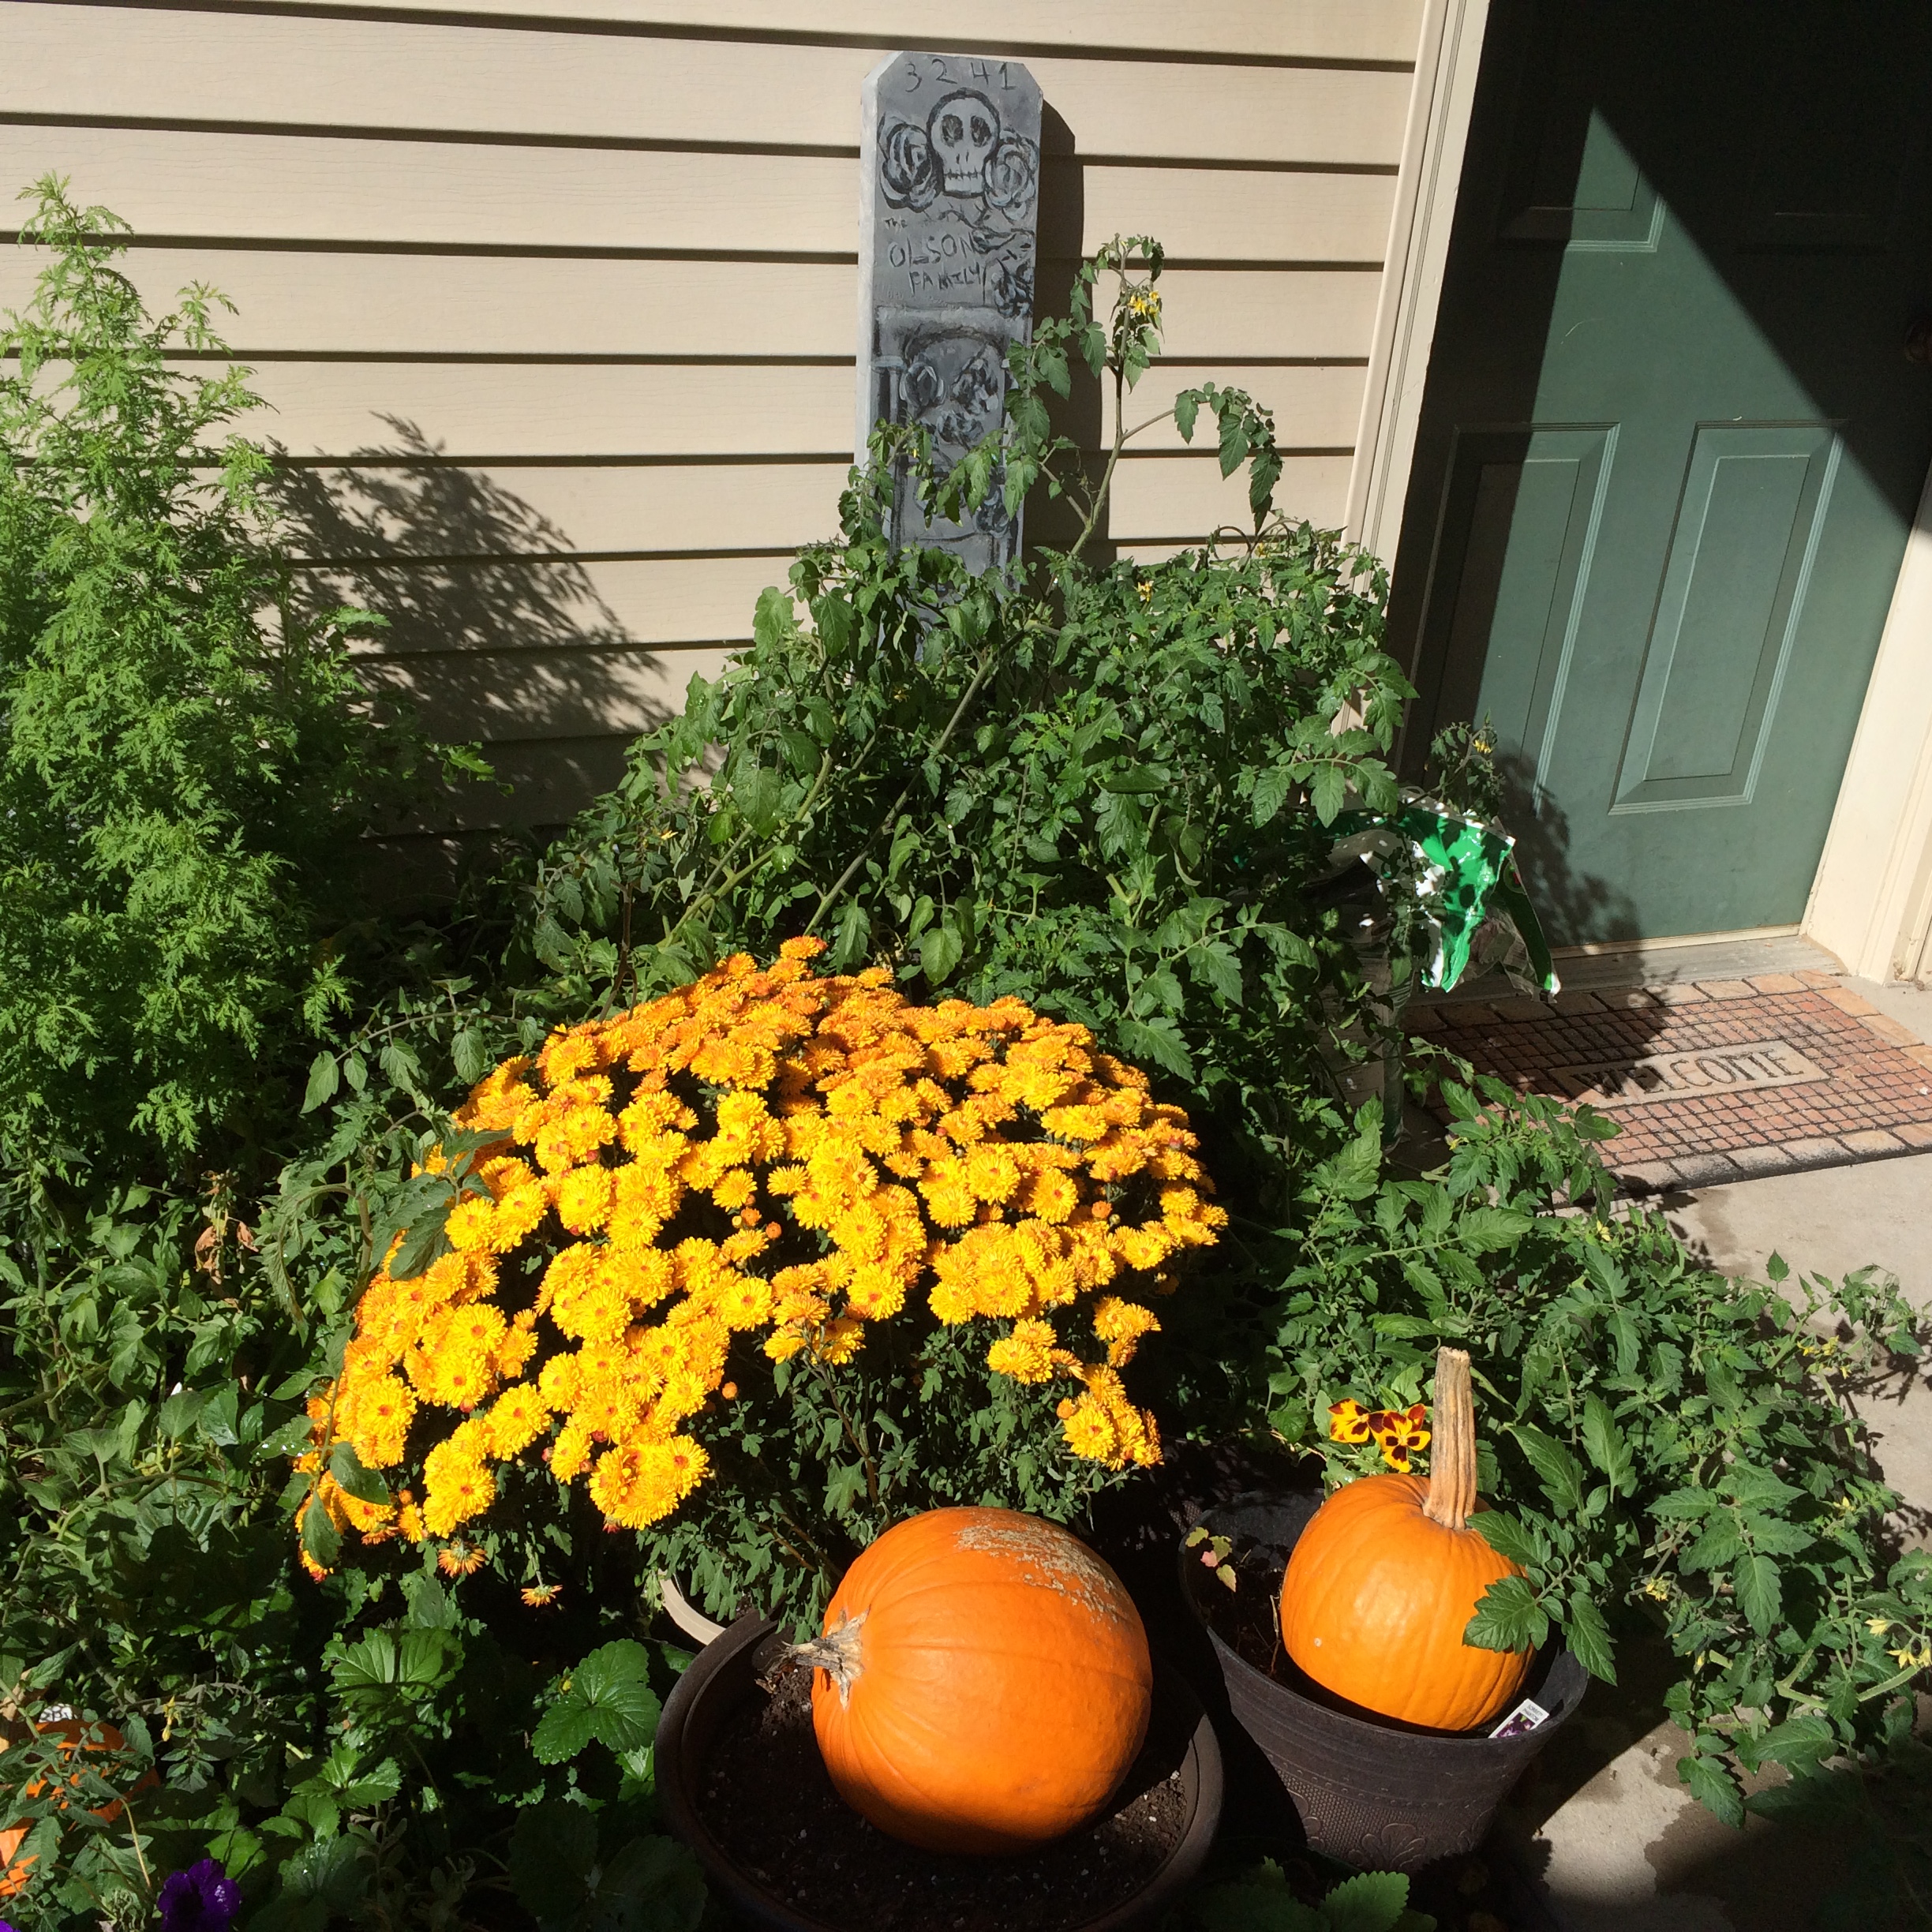
Happy Halloween!
Posted October 23rd, 2015 by Admin

Super cool idea! 😀